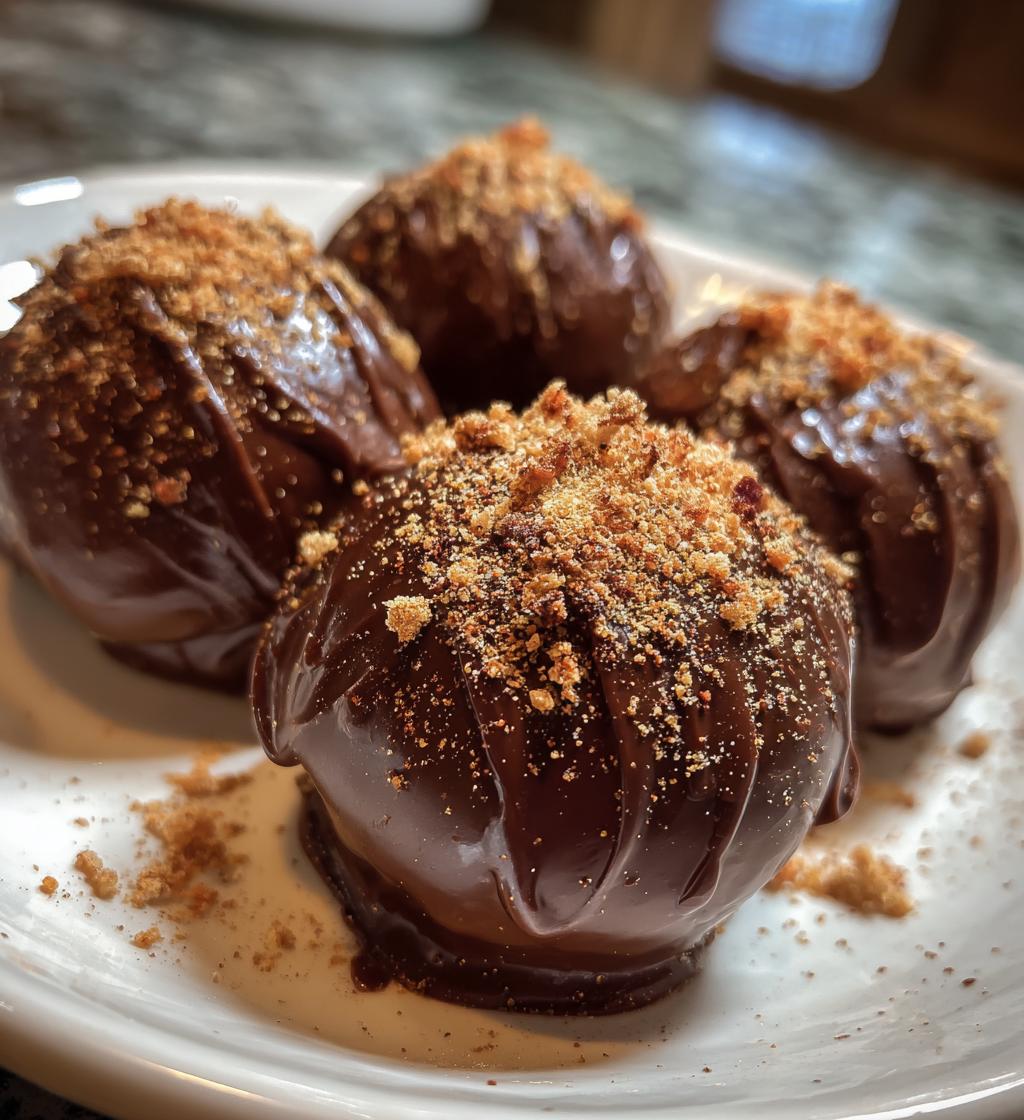
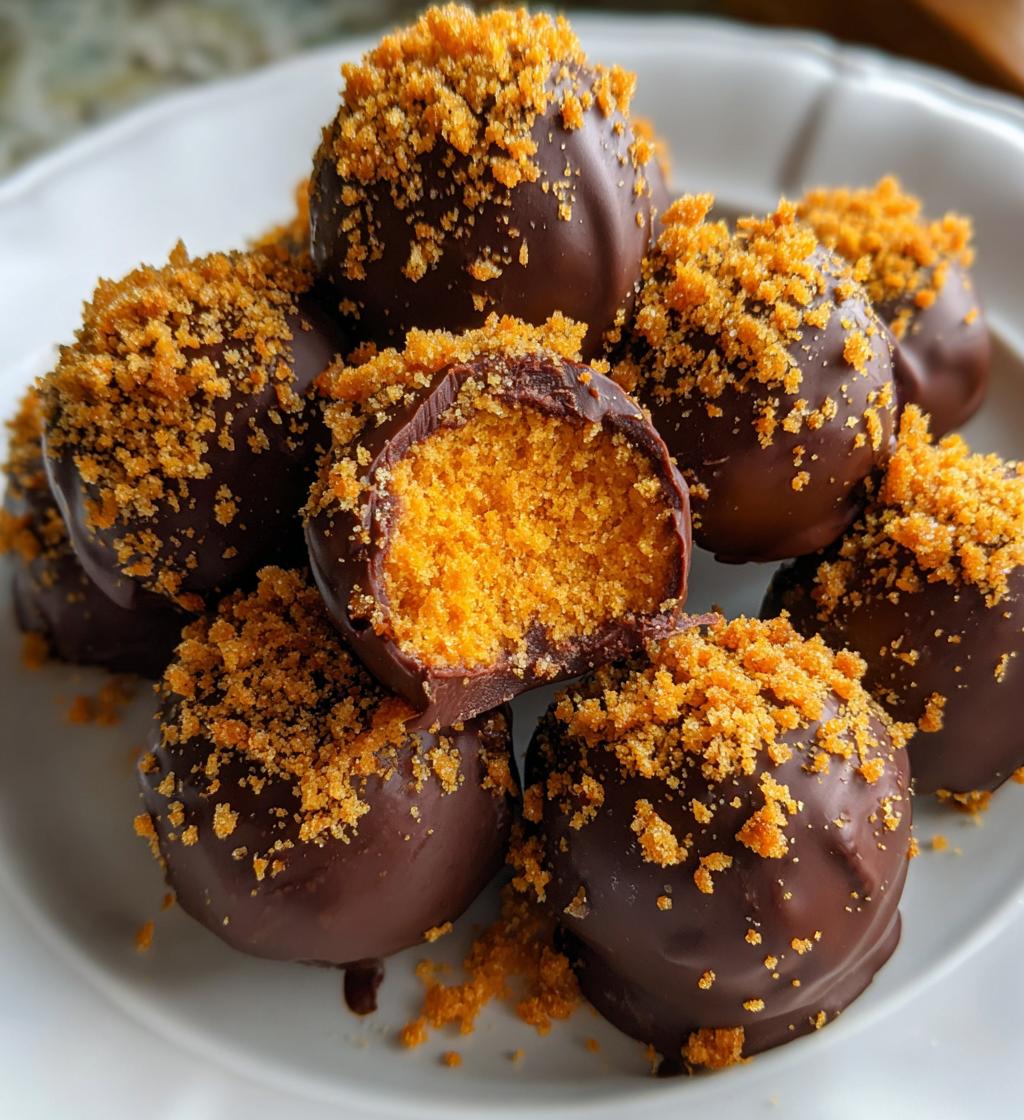
As a passionate home cook, I find joy in creating sweet treats that bring smiles to faces. One of my all-time favorites is the delightful Almond Joy Truffles. These little bites of heaven are inspired by the classic candy bar, combining the rich flavors of chocolate, coconut, and almonds. Imagine sinking your teeth into a creamy, coconut-filled center, with a crunchy almond nestled inside, all enveloped in a luscious dark chocolate coating. It’s like a party in your mouth!
Ingredients for Almond Joy Truffles
Before we embark on this delicious journey of making Almond Joy Truffles, let’s gather our ingredients. I always find that having everything ready makes the cooking process smoother and more enjoyable. Here’s what you’ll need:
- 🌰 Whole almonds – 24 pieces (for garnish)
- 🥥 Shredded coconut – 2 cups (sweetened)
- 🥛 Sweetened condensed milk – 1 cup
- 🍫 Dark chocolate – 8 oz (for coating)
- 🍦 Vanilla extract – 1 teaspoon
Each ingredient plays a vital role in creating the perfect truffle. The shredded coconut gives that delightful chewiness, while the sweetened condensed milk binds everything together, making it irresistibly creamy. And let’s not forget the dark chocolate! It’s the crowning glory that adds a rich, decadent layer to each truffle.
When I first made these truffles, I was amazed at how simple yet satisfying the ingredients were. I remember standing in my kitchen, surrounded by the sweet aroma of coconut and chocolate, feeling like a true chocolatier. It’s a wonderful experience that I can’t wait for you to enjoy!
So, gather your ingredients, and let’s get ready to create some magic in the kitchen. Trust me, once you taste these Almond Joy Truffles, you’ll be hooked!
Tools Needed for Almond Joy Truffles
Before we dive into the delightful process of making Almond Joy Truffles, let’s make sure we have all the right tools at our fingertips. Having the right equipment not only makes the cooking experience smoother but also adds a sprinkle of joy to the process. Here’s what you’ll need:
- 🍽️ Mixing bowl – A large bowl to combine all those delicious ingredients.
- 👐 Measuring cups and spoons – Precision is key, especially when it comes to sweet treats!
- 🍴 Fork or toothpick – Perfect for dipping those truffles into the melted chocolate.
- 🧊 Parchment paper – To line your baking sheet and prevent sticking. Trust me, it makes cleanup a breeze!
- 🔥 Microwave-safe bowl – For melting the chocolate smoothly without any fuss.
- ❄️ Refrigerator – A cool place to chill your truffles and help them set perfectly.
When I first started making these truffles, I remember feeling a bit overwhelmed by the tools. But once I gathered everything, it felt like I was preparing for a fun adventure in my kitchen! Each tool has its purpose, and using them makes the process feel like a delightful dance. The mixing bowl becomes your canvas, and the measuring cups are your paintbrushes, helping you create a masterpiece of flavor.
So, gather your tools, and let’s get ready to roll up our sleeves! The journey to making Almond Joy Truffles is about to begin, and I promise it will be a sweet one!
Step-by-Step Preparation of Almond Joy Truffles
Step 1: Prepare the Base for Almond Joy Truffles
Let’s kick off our truffle-making adventure! The first step is to prepare the base, which is the heart of our Almond Joy Truffles. In a large mixing bowl, I combine the shredded coconut, sweetened condensed milk, and a splash of vanilla extract. As I mix, I can feel the sticky goodness coming together, almost like a sweet embrace. The coconut flakes glisten, and the aroma of vanilla fills the air, making my kitchen feel like a cozy bakery.
It’s important to stir until everything is well combined. I often find myself getting lost in the rhythm of mixing, imagining how delicious these truffles will be. The mixture should be sticky enough to hold its shape when we form the truffles. If it feels too dry, a little more sweetened condensed milk can work wonders. Trust me, this base is the foundation of our delightful treat!
Step 2: Forming the Almond Joy Truffles
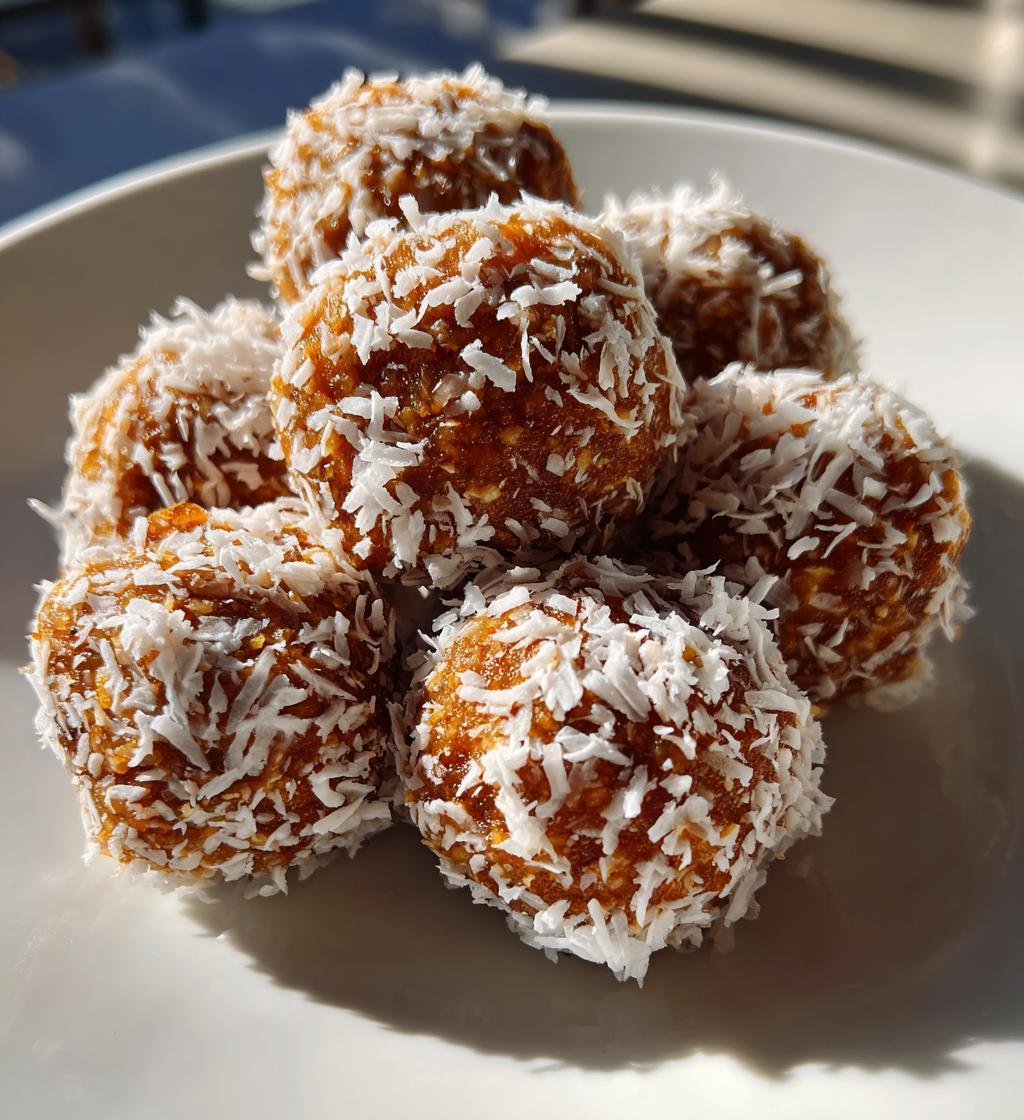
Now comes the fun part—forming the truffles! I take small portions of the coconut mixture, about the size of a golf ball, and roll them into round balls. It’s like crafting little coconut gems! As I shape each ball, I press a whole almond into the center, ensuring it’s snug and secure. This step is where the magic happens; the almond adds that delightful crunch and nutty flavor that pairs perfectly with the sweet coconut.
Once I’ve formed all the truffles, I place them on a parchment-lined baking sheet. The sight of these little treasures lined up makes my heart flutter with excitement. I can already imagine the joy they’ll bring to my family and friends. Plus, the parchment paper makes cleanup a breeze, which is always a win in my book!
Step 3: Coating the Almond Joy Truffles
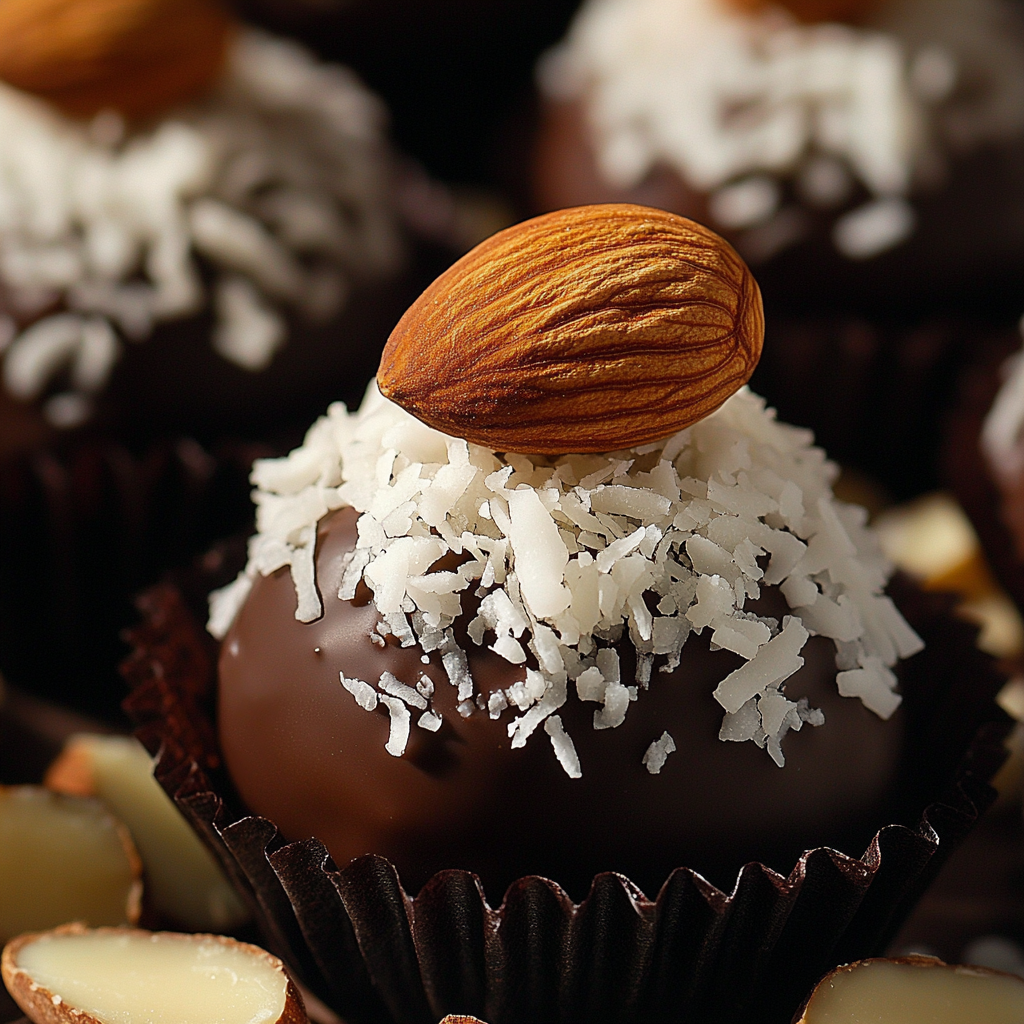
With our truffles formed, it’s time to coat them in chocolate! I start by melting the dark chocolate in a microwave-safe bowl. I break it into small pieces and microwave it in 30-second intervals, stirring in between. Watching the chocolate melt is like witnessing a beautiful transformation. It becomes smooth and glossy, ready to envelop our truffles in a rich, decadent layer.
Once the chocolate is melted, I carefully dip each truffle using a fork or toothpick. I make sure to coat them fully, allowing any excess chocolate to drip off before placing them back on the parchment-lined baking sheet. The moment the chocolate touches the coconut mixture, it’s like a warm hug, sealing in all that deliciousness. I can hardly wait to see the final result!
Step 4: Chilling the Almond Joy Truffles
Now that our truffles are coated in chocolate, it’s time for a little chill time! I return the baking sheet to the refrigerator for about 15-20 minutes. This step is crucial, as it allows the chocolate to set perfectly. While I wait, I can’t help but sneak a peek at my creations, imagining how delightful they’ll taste.
Once the chocolate has hardened, I know it’s time to enjoy the fruits of my labor. The anticipation builds as I think about sharing these Almond Joy Truffles with my loved ones. They’re not just treats; they’re little bites of happiness that I can’t wait to share!

Serving Suggestions for Almond Joy Truffles
Creative Ways to Serve Almond Joy Truffles
Now that our Almond Joy Truffles are ready, it’s time to think about how to present them! I love to get a little creative when serving these delightful treats. One of my favorite ways is to arrange them on a beautiful platter, garnished with a sprinkle of shredded coconut and a few whole almonds. It adds a touch of elegance and makes them look like they belong in a fancy dessert shop!
Another fun idea is to package them in small, clear treat bags tied with colorful ribbons. This makes them perfect for gifting! I remember making a batch for a friend’s birthday, and they were a hit. Each truffle felt like a little present, and the excitement on their face was priceless. You can also place them in decorative cupcake liners for a charming touch. It’s all about making the experience special!
If you’re hosting a gathering, consider creating a truffle bar. Set out your Almond Joy Truffles alongside other treats, like brownies or cookies. Guests can mix and match their favorites, making it a fun and interactive dessert experience. I love watching everyone’s eyes light up as they discover the different flavors and textures. It’s a sweet way to bring people together!
Pairing Almond Joy Truffles with Beverages
What’s a delicious treat without the perfect drink to accompany it? When it comes to pairing beverages with my Almond Joy Truffles, I like to think outside the box. A rich cup of coffee or espresso is a classic choice. The bold flavors of the coffee complement the sweetness of the truffles beautifully. I often enjoy a cozy afternoon with a warm mug in one hand and a truffle in the other—pure bliss!
If you’re in the mood for something a bit more refreshing, try pairing them with a chilled glass of coconut water or a tropical smoothie. The light, fruity flavors enhance the coconut in the truffles, creating a delightful harmony. I remember serving these truffles at a summer gathering with a fruity punch, and it was a match made in heaven!
For those who enjoy a little sparkle, consider serving the truffles with a glass of dessert wine or champagne. The bubbles and sweetness elevate the experience, making it feel extra special. I love to toast with friends while indulging in these treats, creating memories that are just as sweet as the truffles themselves.
So, whether you’re hosting a party or enjoying a quiet evening at home, think about how you can serve your Almond Joy Truffles in a way that brings joy to the moment. After all, it’s not just about the treats; it’s about the experience we create around them!
Tips for Perfect Almond Joy Truffles
Common Mistakes to Avoid with Almond Joy Truffles
As I’ve journeyed through the delightful world of making Almond Joy Truffles, I’ve learned a few lessons along the way. Trust me, avoiding these common mistakes can make all the difference in your truffle-making experience!
- Overmixing the Coconut Mixture: It’s tempting to keep stirring, but overmixing can lead to a dry texture. Just mix until everything is combined and sticky. Think of it like a gentle hug, not a wrestling match!
- Not Chilling Enough: Chilling the truffles is crucial for maintaining their shape during the chocolate coating. If you skip this step, you might end up with a melty mess instead of beautiful truffles. Patience is key!
- Using Too Hot Chocolate: When melting chocolate, be careful not to overheat it. If it’s too hot, it can cause the truffles to melt when dipped. Aim for a smooth, warm consistency—like a cozy blanket on a chilly day.
- Skipping the Garnish: The garnish isn’t just for looks; it adds flavor and texture! Don’t skip the shredded coconut and almond on top. It’s like the cherry on top of a sundae—essential for that perfect finish!
By keeping these tips in mind, you’ll be well on your way to creating Almond Joy Truffles that are not only delicious but also visually stunning. Each truffle will be a little masterpiece, ready to impress your family and friends!
Storage Tips for Almond Joy Truffles
Once you’ve made your scrumptious Almond Joy Truffles, you’ll want to keep them fresh and tasty. I’ve discovered a few simple storage tips that help maintain their delightful flavor and texture.
- Airtight Container: Store your truffles in an airtight container to keep them from drying out. I like to layer them with parchment paper to prevent sticking. It’s like giving them a cozy little home!
- Refrigeration: These truffles are best kept in the refrigerator. The cool temperature helps maintain their shape and keeps the chocolate from melting. Plus, they taste divine when chilled!
- Freezing for Later: If you want to make a big batch, consider freezing some for later. Just place them in a single layer on a baking sheet until frozen, then transfer them to an airtight container. They can last up to three months in the freezer. It’s like having a secret stash of happiness!
- Thawing: When you’re ready to enjoy your frozen truffles, simply take them out and let them thaw in the refrigerator for a few hours. This way, they’ll be perfectly chilled and ready to delight your taste buds!
By following these storage tips, you can savor your Almond Joy Truffles for days to come. Each bite will remind you of the joy of creating something special in your kitchen!
FAQs about Almond Joy Truffles
Can I make Almond Joy Truffles ahead of time?
Absolutely! One of the best things about Almond Joy Truffles is that they can be made ahead of time. In fact, I often prepare them a day or two in advance, especially when I have a gathering coming up. Once they’re made and chilled, just store them in an airtight container in the refrigerator. This not only saves you time but also allows the flavors to meld together beautifully. When it’s time to serve, they’ll be ready to impress your guests with their delightful taste!
What variations can I try with Almond Joy Truffles?
Oh, the possibilities are endless! I love experimenting with different flavors and ingredients to create unique twists on my Almond Joy Truffles. Here are a few fun variations you might enjoy:
- Nutty Delight: Swap out the almonds for other nuts like pecans or hazelnuts. Each nut brings its own flavor and texture, making every bite a new adventure!
- Flavor Infusions: Add a splash of almond extract or coconut extract to the coconut mixture for an extra burst of flavor. It’s like giving your truffles a little personality!
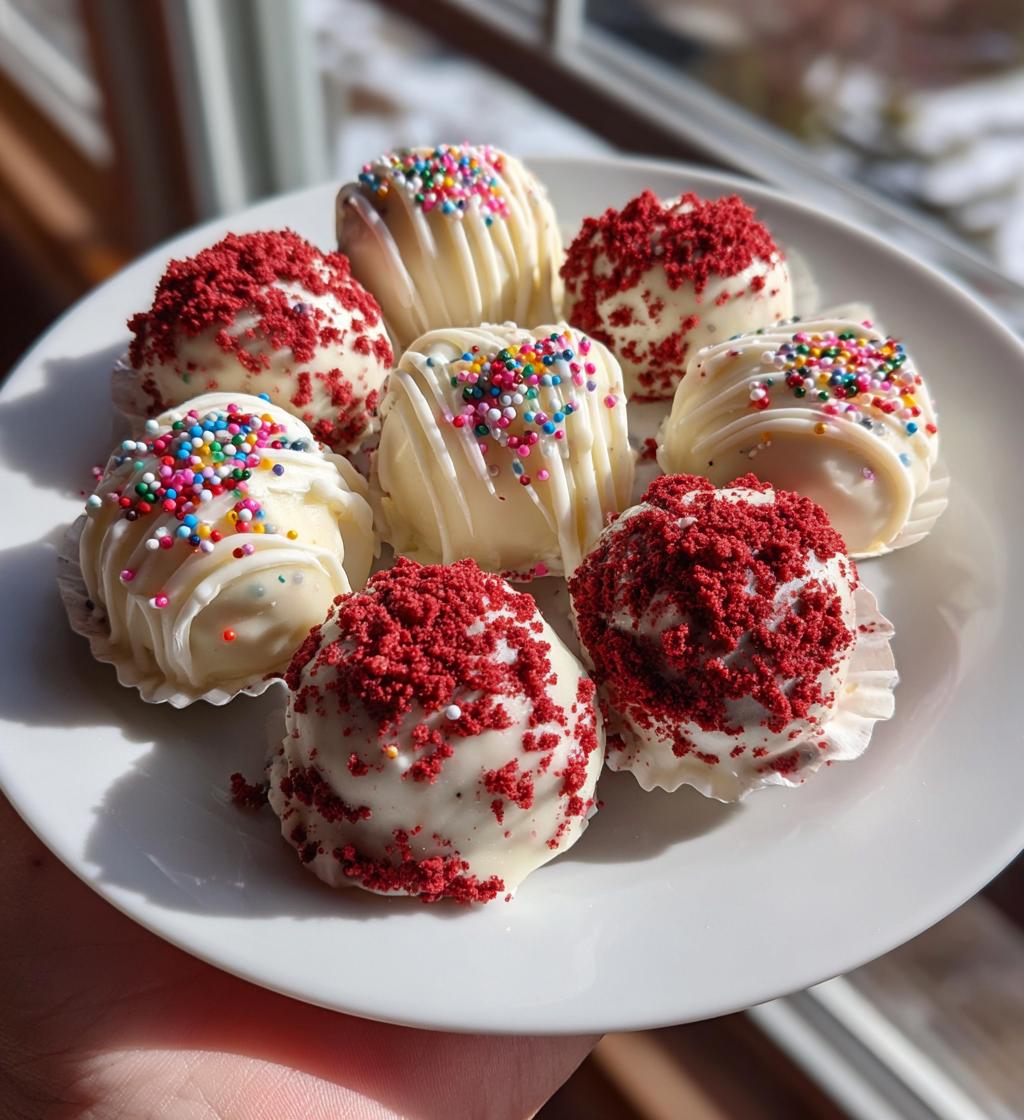
- Chocolate Coating: Instead of dark chocolate, try using milk chocolate or white chocolate for a different taste. You can even drizzle melted chocolate on top for a decorative touch!
- Fruit Fusion: Mix in some dried fruits like cranberries or cherries into the coconut mixture. The tartness of the fruit pairs wonderfully with the sweetness of the truffles.
These variations not only keep things exciting but also allow you to tailor the truffles to your taste preferences. I love sharing these creative twists with friends and family, and they always appreciate the surprise!
How long do Almond Joy Truffles last?
When stored properly, Almond Joy Truffles can last up to a week in the refrigerator. Just make sure to keep them in an airtight container to maintain their freshness. If you decide to freeze them, they can last for about three months. I often make a big batch and freeze some for later, so I always have a sweet treat on hand. Just remember to let them thaw in the refrigerator before enjoying them. Each bite will still taste as delightful as the day you made them!
Conclusion on Almond Joy Truffles
As I wrap up this delightful journey of creating Almond Joy Truffles, I can’t help but feel a sense of joy and accomplishment. These little bites of bliss are not just a treat; they’re a celebration of flavors and memories. Each truffle is a testament to the magic that happens when simple ingredients come together in harmony.
Print
Almond Joy Truffles: Discover the Secret to Bliss!
- Total Time: 30 minutes
- Yield: 24 truffles
- Diet: Vegetarian
Description
Almond Joy Truffles are delightful bites inspired by the classic candy bar, combining chocolate, coconut, and almonds for a rich and creamy treat.
Ingredients
- 🌰 Whole almonds – 24 pieces (for garnish)
- 🥥 Shredded coconut – 2 cups (sweetened)
- 🥛 Sweetened condensed milk – 1 cup
- 🍫 Dark chocolate – 8 oz (for coating)
- 🍦 Vanilla extract – 1 teaspoon
Instructions
- In a large mixing bowl, combine shredded coconut, sweetened condensed milk, and vanilla extract until well mixed.
- Roll small portions of the mixture into balls and press a whole almond into the center of each ball.
- Melt dark chocolate in a microwave-safe bowl, stirring until smooth.
- Dip each truffle into the melted chocolate, allowing excess to drip off, and place on a parchment-lined baking sheet.
- Chill the truffles in the refrigerator for 15-20 minutes until the chocolate is set.
Notes
- Overmixing the coconut mixture can lead to a dry texture.
- Chilling the truffles is crucial for maintaining their shape during coating.
- Be careful not to overheat the chocolate when melting.
- Don’t skip the garnish; it adds flavor and texture.
- Prep Time: 20 minutes
- Cook Time: 10 minutes
- Category: Dessert
- Method: No-bake
- Cuisine: American
Nutrition
- Serving Size: 1 truffle
- Calories: 120
- Sugar: 10g
- Sodium: 30mg
- Fat: 7g
- Saturated Fat: 4g
- Unsaturated Fat: 2g
- Trans Fat: 0g
- Carbohydrates: 12g
- Fiber: 1g
- Protein: 2g
- Cholesterol: 0mg
Keywords: Almond Joy, Truffles, Chocolate, Coconut, Dessert