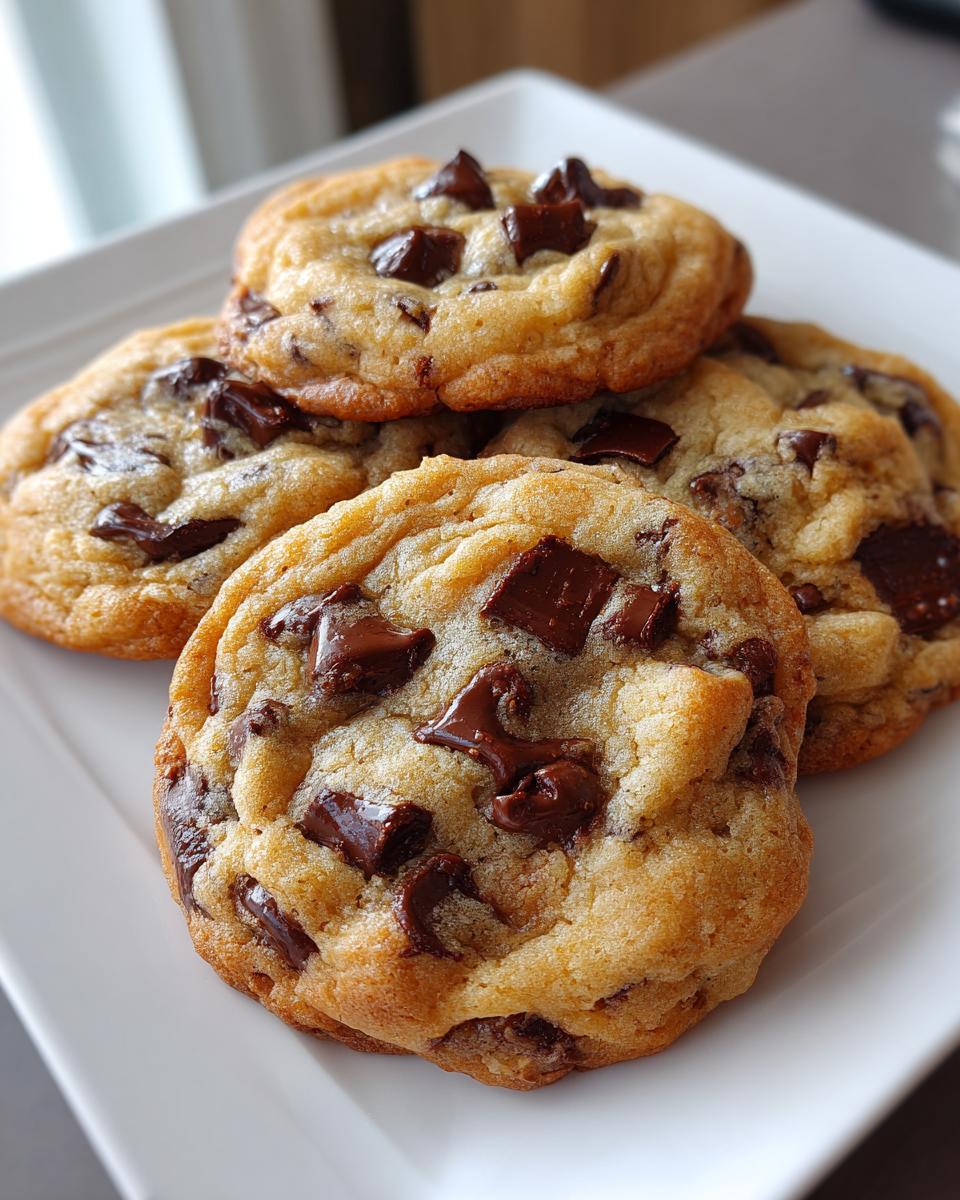
There’s something magical about baking, isn’t there? The scent of warm cookies wafting through the house, the sound of laughter as you share them with loved ones—it’s pure joy! When it comes to classic treats that bring everyone together, Classic Chocolate Chip Cookies are at the top of my list. They’re the ultimate comfort food, and they remind me of cozy afternoons spent in my grandmother’s kitchen, where the best memories were often made over a plate of freshly baked cookies.
These cookies are so much more than just a dessert; they’re a way to show love and spread happiness. Whether you’re baking for a special occasion or just because it’s Tuesday, the rich, gooey chocolate chips melting in every bite will make your heart smile. Plus, they’re easy enough that even the most novice bakers can whip them up and impress everyone! So grab your apron, and let’s dive into the delightful world of classic chocolate chip cookies—trust me, you’ll be glad you did!
Ingredients List
- 1 cup unsalted butter, softened
- 3/4 cup granulated sugar
- 3/4 cup brown sugar, packed
- 1 teaspoon vanilla extract
- 2 large eggs
- 2 1/4 cups all-purpose flour
- 1 teaspoon baking soda
- 1/2 teaspoon salt
- 2 cups chocolate chips
Make sure your butter is softened to room temperature; this helps with that dreamy, creamy texture when you’re mixing. I always like to double-check that I’ve got everything on hand before I start, so I’m not scrambling mid-bake. Trust me, it’s a real bummer to realize you’re out of chocolate chips when the dough is all ready to go! So gather these goodies and let’s get baking!
How to Prepare Classic Chocolate Chip Cookies
Alright, let’s get down to the fun part—making those scrumptious Classic Chocolate Chip Cookies! Follow these steps carefully, and I promise you’ll be rewarded with cookie perfection. I’ll guide you through the process, making it as easy as pie (or should I say cookie?). Here we go!
Step-by-Step Instructions
- Preheat your oven: Start by preheating your oven to 375°F (190°C). This is crucial! You want your cookies to bake evenly, so give your oven a few minutes to warm up while you prepare the dough.
- Cream the butter and sugars: In a large mixing bowl, cream together the softened unsalted butter, granulated sugar, brown sugar, and vanilla extract. I love using a hand mixer for this because it gets everything nice and fluffy! You’ll want to mix it until the mixture is light and creamy—this usually takes about 2-3 minutes. Don’t rush this step; it’s where the magic begins!
- Add the eggs: Now, crack in the two large eggs, one at a time, mixing well after each addition. This helps incorporate the eggs evenly and keeps your dough silky smooth. You can use a whisk or the mixer to do this—whatever you prefer!
- Mix the dry ingredients: In a separate bowl, whisk together the all-purpose flour, baking soda, and salt. It’s a good idea to do this first to avoid lumps in your cookie dough.
- Combine the mixtures: Gradually add the dry mixture into the wet ingredients. I like to do this in thirds, alternating with a splash of milk if the dough feels too thick. Just mix until the flour disappears—overmixing can lead to tough cookies!
- Stir in the chocolate chips: Now for the best part—gently fold in those chocolate chips. You can use semi-sweet, milk chocolate, or even a mix! Just make sure they’re evenly distributed throughout the dough.
- Shape the cookies: Using a rounded tablespoon, drop the cookie dough onto ungreased baking sheets. Make sure to leave enough space between each ball, as they’ll spread while baking. I usually do about 12 cookies per sheet.
- Bake: Pop those babies in the oven and bake for 9 to 11 minutes, or until they’re golden brown around the edges. You want that perfect balance between chewy and crispy!
- Cool them down: Once baked, let them cool on the baking sheets for a few minutes before transferring them to wire racks. This helps them set up just right and makes it easier to move them without breaking.
And there you have it! Follow these steps, and you’ll be well on your way to enjoying some delightful Classic Chocolate Chip Cookies. Can you smell them already? I can, and it’s making me want to bake another batch right now!
Why You’ll Love This Recipe
- Quick Preparation Time: You can whip up these Classic Chocolate Chip Cookies in just about 25 minutes from start to finish! Perfect for when you need a sweet treat in a hurry.
- Delicious Flavor: The combination of rich chocolate chips and the buttery, sweet dough creates a flavor explosion that’s hard to resist. Each bite is a cozy hug from the inside!
- Versatility: Whether you prefer them chewy or crispy, this recipe allows for some flexibility in baking time. Plus, you can mix in nuts, oatmeal, or even swap chocolate chips for toffee bits for a fun twist!
- Family Favorite: These cookies are a hit with kids and adults alike! They’re perfect for family gatherings, lunchboxes, or just a cozy night in with a glass of milk.
- Make Ahead: You can prepare the dough ahead of time and freeze it for up to three months. Just scoop and bake whenever the cookie craving strikes!
What’s not to love? This recipe is a classic for a reason, and I can’t wait for you to try it and share it with your loved ones!
Tips for Success
Getting those Classic Chocolate Chip Cookies just right can be a delightful challenge, but I’ve got some expert tips that’ll have you baking like a pro in no time! Trust me, these little nuggets of wisdom will help you achieve cookie perfection.
Use Quality Ingredients
Seriously, the quality of your ingredients makes a huge difference! Opt for real unsalted butter instead of margarine, as it brings richness and flavor that you just can’t replicate. And don’t skimp on the chocolate chips—choose a good brand that you love to eat straight from the bag. You’ll thank me later when you take that first bite!
Don’t Overmix
When combining your wet and dry ingredients, remember: less is more! Overmixing can lead to tough cookies, and nobody wants that. Just mix until you see no more flour streaks. Your dough should look a bit lumpy, and that’s perfectly fine!
Watch the Baking Time
Ovens can vary, so keep an eye on your cookies as they bake. Start checking them at the 9-minute mark. They might look a little underbaked in the middle, but don’t worry! They’ll continue to cook on the baking sheet once you take them out. A little patience here goes a long way in ensuring you get that gooey center!
Chill the Dough
If you have the time, chilling your cookie dough for about 30 minutes can enhance the flavor and texture. It helps the cookies maintain their shape while baking and results in a thicker, chewier cookie. Plus, it gives the flavors a chance to meld together beautifully!
Experiment with Mix-Ins
Feel free to get creative! While chocolate chips are classic, you can mix in chopped nuts, toffee bits, or even dried fruit for a fun twist. Just be sure not to overload your dough—balance is key to keeping that delicious texture!
By keeping these tips in mind, you’ll be well on your way to creating the most scrumptious Classic Chocolate Chip Cookies. Happy baking, and enjoy every bite of your sweet creations!
Storage & Reheating Instructions
So, you’ve baked up a delicious batch of Classic Chocolate Chip Cookies and want to make sure they stay fresh for as long as possible—great thinking! Proper storage is key to keeping those cookies tasting delightful, even a few days later.
To store your leftover cookies, let them cool completely on a wire rack first. Once they’re cool, place them in an airtight container. I love using a simple cookie jar or a resealable plastic bag. Layering parchment paper between the cookies can help prevent them from sticking together, especially if you’ve made a big batch!
These cookies can be stored at room temperature for up to a week. Just make sure they’re in a cool, dry place away from direct sunlight. If you find yourself with more cookies than you can eat (which is a rare problem!), you can also freeze them! Just make sure they’re completely cool, then wrap each cookie individually in plastic wrap before placing them in a freezer bag. They’ll keep well in the freezer for up to three months. Easy peasy!
Now, when the cookie cravings hit and you want to enjoy one of those frozen treats, it’s simple to reheat them. Just preheat your oven to 350°F (175°C) and place the cookies on a baking sheet. Warm them for about 5-7 minutes, or until they’re just heated through. The chocolate chips will get all melty again, and the cookies will taste like they just came out of the oven! You can also pop them in the microwave for about 10-15 seconds, but watch out—they can get a bit too soft if you’re not careful.
With these storage and reheating tips, you’ll ensure that your Classic Chocolate Chip Cookies remain a delightful treat for days to come. Enjoy every last crumb!
Nutritional Information
When it comes to enjoying Classic Chocolate Chip Cookies, it’s always good to be aware of the nutritional content, but keep in mind that these values can vary based on the specific ingredients and brands you use. While I strive to provide accurate information, it’s not set in stone!
Generally speaking, here’s a breakdown of the typical nutritional values you can expect from one cookie:
- Calories: 150
- Fat: 7g
- Saturated Fat: 4g
- Cholesterol: 20mg
- Sodium: 90mg
- Carbohydrates: 20g
- Fiber: 1g
- Sugars: 10g
- Protein: 2g
These cookies are a delightful treat, but moderation is key! So, enjoy them as a special snack and savor every bite without worrying too much about the numbers. Happy baking and indulging!
FAQ Section
Q1. Can I use whole wheat flour instead of all-purpose flour?
Absolutely! You can substitute half of the all-purpose flour with whole wheat flour for a slightly nuttier flavor and added nutrients. Just keep in mind that it may change the texture a bit, making the cookies a tad denser.
Q2. How do I know when my cookies are done baking?
Great question! Cookies are usually done when they’re golden brown around the edges but still soft in the center. They’ll continue to cook a bit after you take them out of the oven, so don’t worry if they look slightly underbaked!
Q3. Can I make the dough in advance and freeze it?
Yes, you can! Just scoop the cookie dough into individual portions and freeze them on a baking sheet. Once frozen, transfer the dough balls to a zip-top bag for up to three months. When you’re ready to bake, just pop them straight into the oven—no need to thaw!
Q4. What’s the best way to store leftover cookies?
To keep your Classic Chocolate Chip Cookies fresh, store them in an airtight container at room temperature. They’ll stay delicious for up to a week! If you want to keep them longer, consider freezing them as mentioned before.
Q5. Can I add nuts or other mix-ins to the recipe?
Of course! Feel free to get creative with your cookies. Chopped nuts, toffee bits, or even dried fruit can be fantastic additions. Just remember not to overload the dough too much to maintain that perfect cookie texture!
Serving Suggestions
Now that you’ve baked up a batch of those irresistible Classic Chocolate Chip Cookies, you might be wondering what to pair them with for the ultimate treat experience. I’ve got some delightful ideas that will take your cookie enjoyment to the next level!
Milk: You can’t go wrong with a classic glass of cold milk! The creamy, smooth texture perfectly complements the rich chocolate and buttery flavors of the cookies. Whether it’s whole milk, almond milk, or even chocolate milk, it’s a match made in heaven.
Coffee: For a more grown-up pairing, try enjoying your cookies with a warm cup of coffee. The robust flavors of a freshly brewed cup bring out the sweetness of the cookies. I love a nice medium roast or even a frothy cappuccino—it’s the perfect afternoon pick-me-up! Learn more about coffee pairings.
Ice Cream: Want to make it extra special? Serve your cookies with a scoop of vanilla ice cream! You can sandwich the cookies around the ice cream for a delicious homemade ice cream sandwich. Trust me, the warm cookie combined with the cold ice cream is pure bliss!
Chocolate Sauce: Drizzle some warm chocolate sauce over your cookies for a decadent touch. It adds another layer of chocolate goodness that’s hard to resist. You can even sprinkle a bit of sea salt on top for that sweet-salty flavor explosion!
Fruit Salad: If you’re looking for a lighter option, a refreshing fruit salad pairs beautifully with cookies. The natural sweetness and acidity of fresh fruit balance the richness of the cookies, making it a delightful combination.
Feel free to mix and match these suggestions based on your mood or occasion. Whether you’re hosting a cozy gathering or just enjoying a quiet night in, these pairings will elevate your Classic Chocolate Chip Cookies experience to new heights. Enjoy every delicious bite!
Print
Classic Chocolate Chip Cookies: 7 Reasons to Bake Today
- Total Time: 25 minutes
- Yield: 24 cookies 1x
- Diet: Vegetarian
Description
Classic Chocolate Chip Cookies are a timeless treat loved by many.
Ingredients
- 1 cup unsalted butter, softened
- 3/4 cup granulated sugar
- 3/4 cup brown sugar, packed
- 1 teaspoon vanilla extract
- 2 large eggs
- 2 1/4 cups all-purpose flour
- 1 teaspoon baking soda
- 1/2 teaspoon salt
- 2 cups chocolate chips
Instructions
- Preheat your oven to 375°F (190°C).
- In a bowl, cream together butter, granulated sugar, brown sugar, and vanilla.
- Add eggs one at a time, mixing well after each addition.
- In a separate bowl, combine flour, baking soda, and salt.
- Gradually mix dry ingredients into the wet mixture.
- Stir in chocolate chips.
- Drop rounded tablespoons of dough onto ungreased baking sheets.
- Bake for 9 to 11 minutes until golden brown.
- Let cool on baking sheets for a few minutes before transferring to wire racks.
Notes
- Store cookies in an airtight container.
- For chewy cookies, do not overbake.
- You can substitute half of the chocolate chips with nuts if desired.
- Prep Time: 15 minutes
- Cook Time: 10 minutes
- Category: Dessert
- Method: Baking
- Cuisine: American
Nutrition
- Serving Size: 1 cookie
- Calories: 150
- Sugar: 10g
- Sodium: 90mg
- Fat: 7g
- Saturated Fat: 4g
- Unsaturated Fat: 3g
- Trans Fat: 0g
- Carbohydrates: 20g
- Fiber: 1g
- Protein: 2g
- Cholesterol: 20mg
Keywords: Chocolate, Cookies, Dessert, Baking, Classic