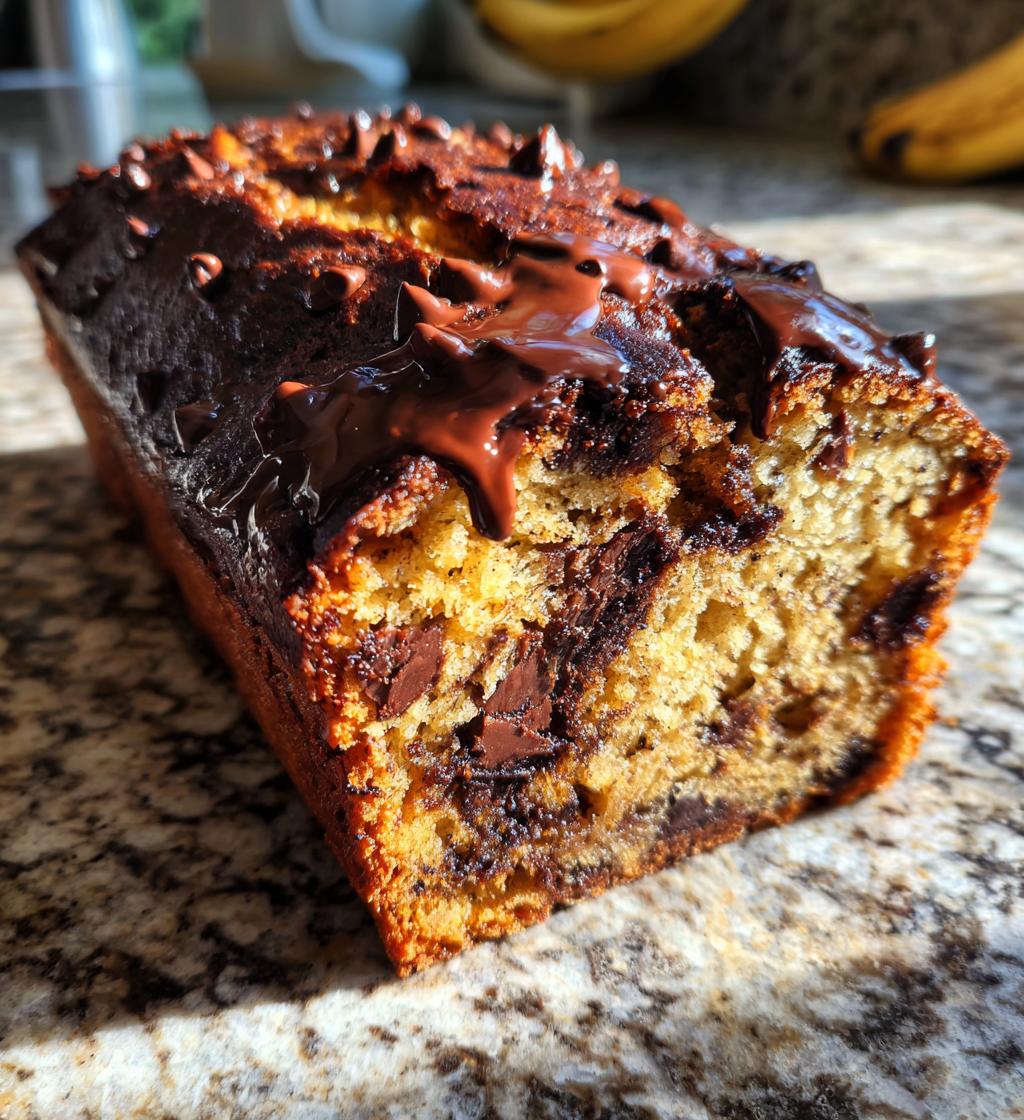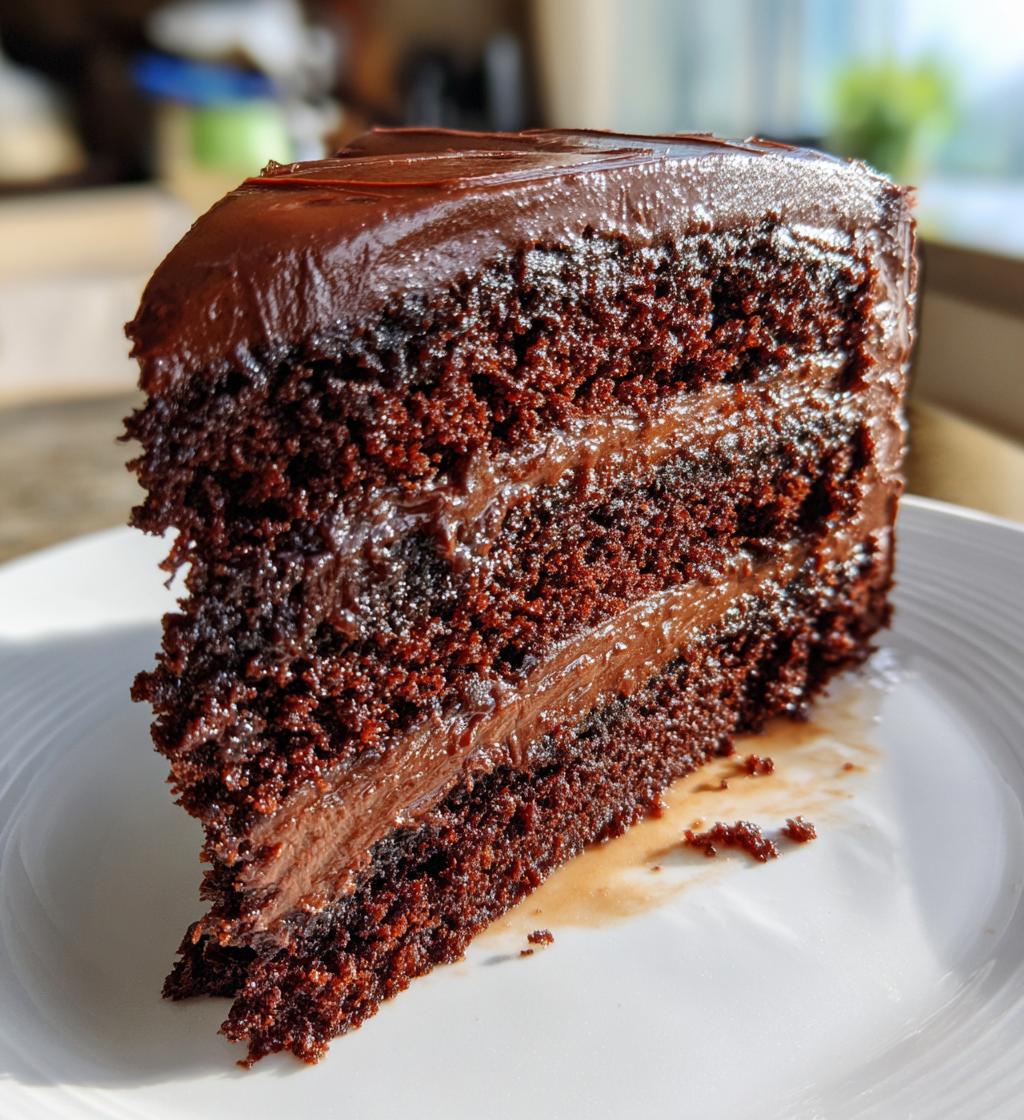
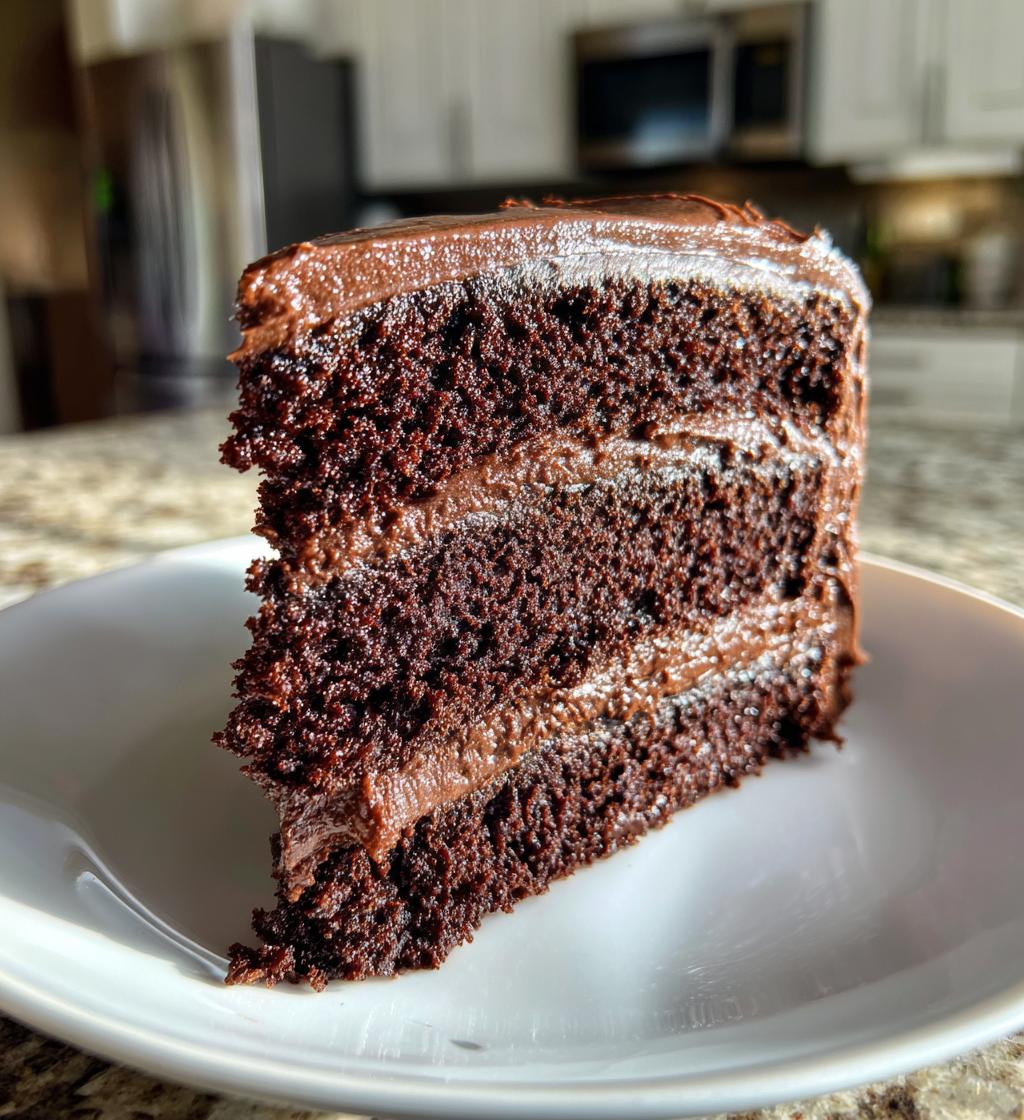
There’s something magical about baking a Classic Chocolate Layer Cake that brings back the sweetest memories of joy and celebration. I can’t help but smile when I think of the times I’ve whipped up this rich, moist cake for birthdays, anniversaries, or just because it’s a Tuesday. The air fills with the warm, comforting aroma of chocolate, and I can practically hear the delighted gasps when I unveil it. This recipe is special to me; it’s been passed down through friends and family, each adding their own twist while keeping the core flavors intact.
What makes this Classic Chocolate Layer Cake stand out is the perfect balance of deep chocolate flavor and a tender, fluffy crumb that melts in your mouth. I love that it’s not just a cake; it’s a way to create lasting memories, whether I’m celebrating a milestone or simply indulging in a sweet treat with loved ones. Trust me, once you try this cake, it’ll become your go-to for any occasion, and it’s so easy to make that you’ll find yourself baking it again and again!
Ingredients List
Let’s gather everything we need to make this decadent Classic Chocolate Layer Cake! Here’s what you’ll need:
- 2 cups all-purpose flour: This is the backbone of our cake, giving it structure and that lovely crumb.
- 2 cups granulated sugar: For that perfect sweetness that balances the rich cocoa flavor.
- 3/4 cup unsweetened cocoa powder: The star of the show! Make sure it’s high-quality for the best flavor.
- 1 1/2 teaspoons baking powder: This helps the cake rise and gives it a light texture.
- 1 1/2 teaspoons baking soda: A crucial player in ensuring our cake is fluffy and not dense.
- 1 teaspoon salt: Just a pinch enhances all the flavors beautifully.
- 2 large eggs: These add moisture and richness to our cake.
- 1 cup whole milk: For a moist, tender crumb, whole milk is the way to go!
- 1/2 cup vegetable oil: This keeps the cake incredibly moist and helps with that tender texture.
- 2 teaspoons vanilla extract: A splash of vanilla adds warmth and depth to our chocolate flavor.
- 1 cup boiling water: Believe it or not, this is a secret trick that ensures a super moist cake!
Gather these ingredients, and you’re all set to create something truly special! Trust me, the magic happens when you combine them just right.
How to Prepare Classic Chocolate Layer Cake
Alright, let’s dive into the fun part – making this delicious Classic Chocolate Layer Cake! Follow these steps, and you’ll be well on your way to chocolate heaven.
- Preheat your oven: First things first, preheat your oven to 350°F (175°C). This ensures it’s nice and hot when your batter is ready to go in.
- Prepare your cake pans: Grab two 9-inch round cake pans and grease them with a bit of butter or non-stick spray. Then, sprinkle a little flour in each pan, swirling it around to coat the sides. This makes it super easy to release the cakes later!
- Mix your dry ingredients: In a large mixing bowl, combine the all-purpose flour, sugar, cocoa powder, baking powder, baking soda, and salt. Whisk them together until everything is well blended and there are no lumps. It’s like a chocolatey hug waiting to happen!
- Add the wet ingredients: Now, crack in the eggs, pour in the whole milk, vegetable oil, and vanilla extract. Beat everything together on medium speed for about 2 minutes. You want it to be smooth and creamy, like a dreamy chocolate milkshake!
- Incorporate boiling water: Here’s the secret weapon! Carefully stir in the boiling water. The batter will be thin, but that’s exactly what you want. This step helps create that moist texture we all love.
- Pour the batter: Divide the batter evenly between your prepared pans. I like to use a spatula to scrape every last bit of that luscious mixture into the pans. Don’t waste any of that chocolate goodness!
- Bake the cakes: Slide the pans into your preheated oven and bake for 30 to 35 minutes. Keep an eye on them! You’ll know they’re done when a toothpick inserted into the center comes out clean. If you smell that irresistible chocolate aroma wafting through your kitchen, you’re almost there!
- Cool the cakes: Once they’re done baking, let the cakes cool in the pans for about 10 minutes. This allows them to firm up a bit. Then, carefully run a knife around the edges, flip them out onto a wire rack, and let them cool completely. Patience is key here; you want to frost when they’re fully cooled to avoid the dreaded melting frosting!
And there you have it! Follow these steps, and you’ll create a Classic Chocolate Layer Cake that’s sure to impress. Just wait until you frost it – that’s the best part!
Why You’ll Love This Recipe
- Rich Chocolate Flavor: Each bite is packed with deep, decadent chocolate goodness that satisfies any chocolate lover’s cravings.
- Moist and Tender Texture: Thanks to the secret ingredient of boiling water, this cake stays incredibly moist, making it melt-in-your-mouth delicious.
- Perfect for Celebrations: Whether it’s a birthday, anniversary, or just a cozy gathering, this Classic Chocolate Layer Cake is the ultimate showstopper that will impress your guests.
- Easy to Make: With simple ingredients and straightforward steps, you’ll find that baking this cake is a breeze, even if you’re a beginner!
- Endless Customization: You can easily dress it up with your favorite frosting or fillings, making it versatile for any occasion or taste preference.
Trust me, once you experience the magic of this cake, you’ll be reaching for the recipe time and time again!
Tips for Success
Now that you’re ready to whip up this Classic Chocolate Layer Cake, let’s talk about some tips that’ll help ensure your baking adventure goes off without a hitch!
- Quality Ingredients Matter: Trust me, using high-quality cocoa powder and pure vanilla extract makes a world of difference in flavor. Don’t skimp on these – your cake deserves the best!
- Measure Carefully: Baking is a science, so be sure to measure your ingredients accurately. Use the scoop and level method for flour (scoop it into your measuring cup and then level it off with a knife) to avoid packing it down.
- Don’t Overmix: Once you combine your wet and dry ingredients, mix until just combined. Overmixing can lead to a dense cake – we want a fluffy, tender crumb, not a brick!
- Keep an Eye on Baking Time: Ovens can vary, so start checking your cakes a few minutes before the suggested baking time. Remember, a toothpick should come out clean, but a few moist crumbs are just fine!
- Cool Completely: Allow your cakes to cool fully before frosting. If they’re warm, the frosting will slide right off, leaving you with a gooey mess instead of a beautifully layered cake!
- Don’t Rush the Frosting: When it’s time to frost, make sure your frosting is at room temperature and spreadable. A chilled cake might seem tempting, but warm cake + cold frosting is a recipe for disaster!
By following these tips, you’ll set yourself up for success and create a Classic Chocolate Layer Cake that’s as delightful to look at as it is to eat. Happy baking!
Variations
One of the best things about this Classic Chocolate Layer Cake is how easily it can be customized to suit your taste or the occasion. Here are some fun ideas to switch things up and make this cake your own!
- Flavorful Fillings: Consider adding a layer of raspberry jam or fresh strawberries between the cake layers for a fruity twist. You could also spread a layer of peanut butter or Nutella for a delightful surprise in every bite!
- Alternative Frostings: While a classic chocolate buttercream is divine, why not try a cream cheese frosting for a tangy contrast? Or, go for a rich ganache made with heavy cream and chocolate for an indulgent finish.
- Adjusting Cocoa Content: If you’re feeling adventurous, swap out some of the unsweetened cocoa powder with dark cocoa powder for a more intense chocolate flavor. This gives the cake a deeper, darker hue and a richer taste!
- Adding Coffee: For those who enjoy a hint of espresso, mix in a tablespoon of instant coffee granules with your dry ingredients. It enhances the chocolate flavor beautifully without tasting like coffee.
- Nutty Additions: Fold in some chopped walnuts or pecans into the batter for added texture and a nutty flavor. This little crunch can take your cake to the next level!
- Going Gluten-Free: If you need a gluten-free option, simply substitute the all-purpose flour with a 1:1 gluten-free baking blend. Just make sure it contains xanthan gum for the best texture!
Feel free to mix and match these ideas! The beauty of this Classic Chocolate Layer Cake is that it can be anything you want it to be. So, get creative and enjoy the delicious journey of baking!
Nutritional Information Section
Now, let’s take a look at the nutritional information for this delightful Classic Chocolate Layer Cake. Please keep in mind that these values are estimates and can vary based on the specific ingredients you use and the portion sizes:
- Serving Size: 1 slice
- Calories: 350
- Fat: 15g
- Saturated Fat: 5g
- Unsaturated Fat: 8g
- Trans Fat: 0g
- Cholesterol: 40mg
- Sodium: 300mg
- Carbohydrates: 50g
- Fiber: 2g
- Sugar: 28g
- Protein: 5g
These numbers give you a good idea of what to expect when you indulge in this cake. Whether you’re sharing it at a gathering or savoring a slice at home, it’s always good to know what you’re enjoying!
Storage & Reheating Instructions
After you’ve enjoyed your delicious Classic Chocolate Layer Cake, you might have some leftovers (if you’re lucky!). Storing it properly is key to keeping that moist texture and rich flavor intact. Here’s how I like to do it:
- Storing Leftovers: Once your cake is completely cooled, wrap each layer tightly with plastic wrap or aluminum foil. This protects it from drying out and keeps it fresh. If you’ve already frosted the cake, place it in an airtight container in the fridge. Just make sure to separate layers with parchment paper to prevent sticking!
- Room Temperature: If you plan to eat the cake within a couple of days, you can leave it at room temperature. Just cover it with a cake dome or a loose layer of plastic wrap to keep it safe from any curious kitchen critters.
- Freezing for Later: Got more cake than you can handle? No problem! You can freeze the layers for up to three months. Just ensure they’re well-wrapped and sealed in a freezer-safe container. To thaw, move the cake to the refrigerator overnight before bringing it to room temperature to enjoy.
When it comes time to indulge in those leftovers, here’s how to reheat your cake:
- Microwave: If you want a quick fix, pop a slice in the microwave for about 10-15 seconds. This warms it up beautifully without drying it out. Just keep an eye on it to avoid overheating!
- Oven: For a slightly more decadent experience, you can reheat individual slices in a preheated oven at 350°F (175°C) for about 5-10 minutes. This brings back that freshly baked taste and makes the chocolate flavor sing!
Now you’re all set to enjoy your Classic Chocolate Layer Cake, whether it’s fresh or reheated! There’s just something so comforting about knowing you’ve got a slice waiting for you whenever the craving strikes.
FAQ Section
Got questions about baking this Classic Chocolate Layer Cake? Don’t worry; I’ve got you covered! Here are some common queries that pop up, along with my answers to help you out:
- Can I make this cake in advance? Absolutely! This Classic Chocolate Layer Cake actually tastes even better the next day as the flavors meld together. You can bake the cake layers a day ahead, let them cool completely, wrap them tightly in plastic wrap, and store them in the fridge. Just remember to frost it the day you plan to serve it for the best texture!
- What is the best way to frost the cake? For frosting, I recommend starting with a crumb coat. This means spreading a thin layer of frosting over the entire cake to seal in any loose crumbs. Chill it for about 30 minutes, then go in with a thicker layer of frosting for that beautiful finish. If you want to get fancy, using a spatula or a cake scraper can help achieve those smooth, professional edges!
- How do I know when the cake is done? Great question! The simplest way to check if your Classic Chocolate Layer Cake is done is by doing the toothpick test. Insert a toothpick into the center of the cake; if it comes out clean or with just a few moist crumbs, it’s ready to come out of the oven. Also, look for the edges pulling away slightly from the pan, and give it a gentle touch – it should spring back when lightly pressed.
Hopefully, these answers help you feel more confident in your baking adventure! If you have any more questions, don’t hesitate to reach out. Happy baking!
Print
Classic Chocolate Layer Cake: 7 Steps to Sweet Success
- Total Time: 55 minutes
- Yield: 12 servings 1x
- Diet: Vegetarian
Description
This is a classic chocolate layer cake that is rich and moist.
Ingredients
- 2 cups all-purpose flour
- 2 cups sugar
- 3/4 cup unsweetened cocoa powder
- 1 1/2 teaspoons baking powder
- 1 1/2 teaspoons baking soda
- 1 teaspoon salt
- 2 large eggs
- 1 cup whole milk
- 1/2 cup vegetable oil
- 2 teaspoons vanilla extract
- 1 cup boiling water
Instructions
- Preheat your oven to 350°F (175°C).
- Grease and flour two 9-inch round cake pans.
- In a large bowl, combine flour, sugar, cocoa, baking powder, baking soda, and salt.
- Add eggs, milk, oil, and vanilla. Beat on medium speed for 2 minutes.
- Stir in boiling water until well combined.
- Pour batter evenly into prepared pans.
- Bake for 30 to 35 minutes or until a toothpick comes out clean.
- Cool in pans for 10 minutes, then remove from pans to cool completely.
Notes
- Use high-quality cocoa powder for best flavor.
- Store leftover cake in an airtight container.
- Frost with your favorite chocolate frosting.
- Prep Time: 20 minutes
- Cook Time: 35 minutes
- Category: Dessert
- Method: Baking
- Cuisine: American
Nutrition
- Serving Size: 1 slice
- Calories: 350
- Sugar: 28g
- Sodium: 300mg
- Fat: 15g
- Saturated Fat: 5g
- Unsaturated Fat: 8g
- Trans Fat: 0g
- Carbohydrates: 50g
- Fiber: 2g
- Protein: 5g
- Cholesterol: 40mg
Keywords: Classic Chocolate Layer Cake