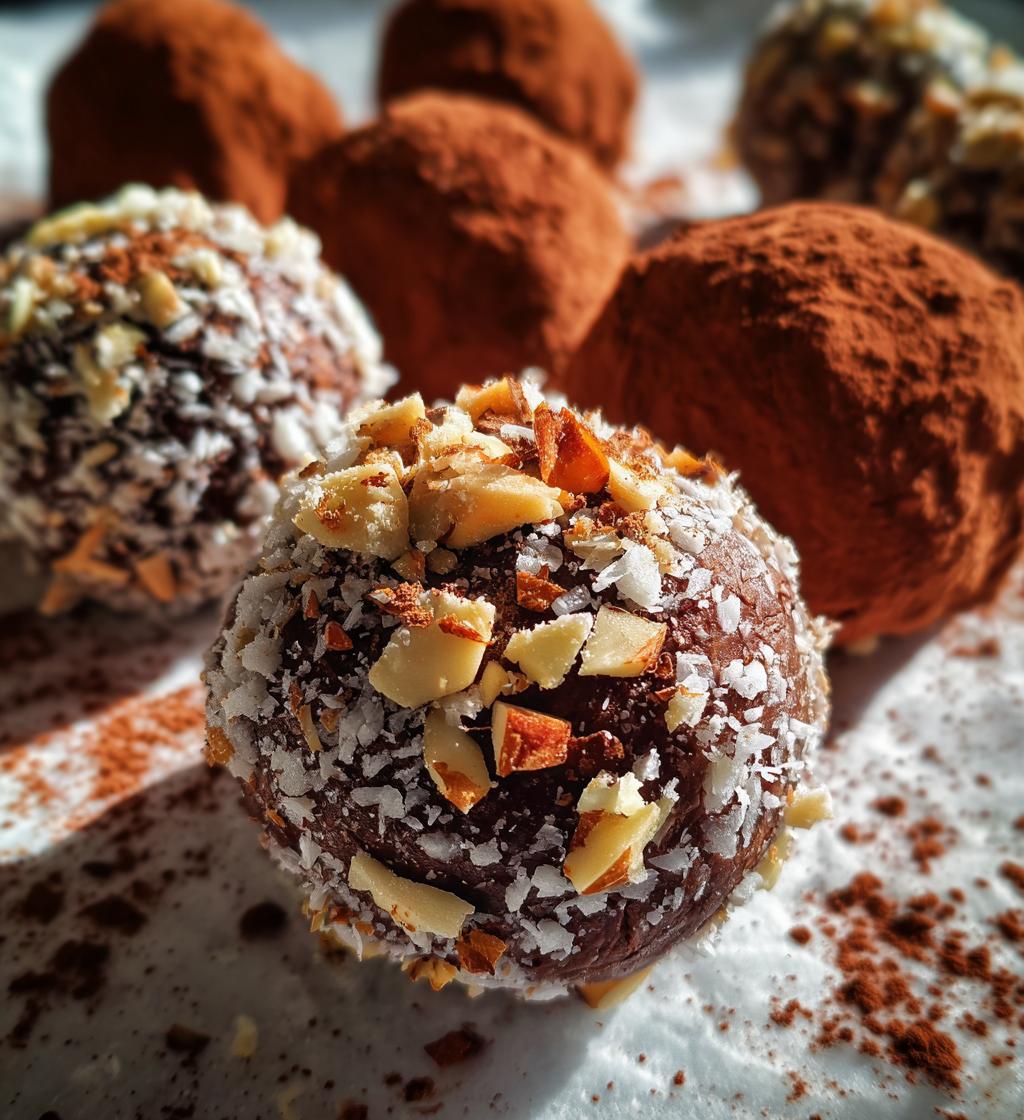
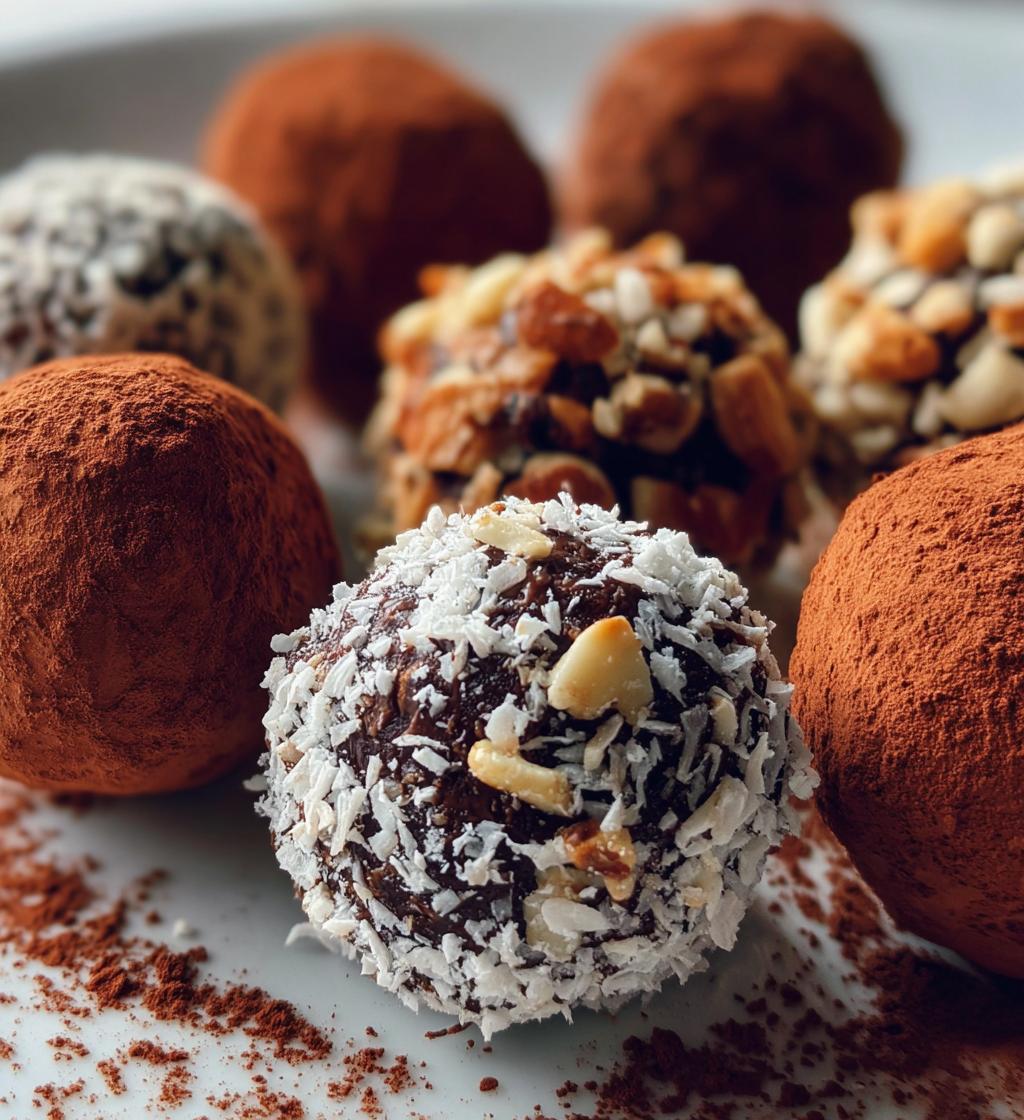
There’s something truly magical about making Classic & Chocolate Truffles at home. The moment you melt that rich chocolate and mix it with cream, you know you’re in for a treat! These little bites of heaven are not just easy to make, but they also offer a delightful experience of creamy, melt-in-your-mouth goodness. You can customize them with cocoa powder, crushed nuts, or even coconut flakes for that extra flair. Trust me, once you start crafting these truffles, you’ll find it hard to resist sneaking a few before they even make it to the fridge!
I remember the first time I made truffles; I was so excited to share them with friends and family. Their eyes lit up with joy as they tasted that smooth chocolatey indulgence. It was a hit at every gathering! With just a few simple ingredients and a little bit of patience, you can create these decadent treats that are perfect for celebrations or just a sweet moment to yourself. So, let’s dive into this delightful adventure and whip up some homemade truffles that will impress everyone!
Ingredients List
Before we get our hands chocolatey, let’s gather everything we need to make these delightful Classic & Chocolate Truffles. Here’s what you’ll need:
- 1 cup heavy cream
- 8 oz semi-sweet chocolate, chopped
- 1 tsp vanilla extract
- Cocoa powder for dusting
- Optional toppings: crushed nuts, coconut flakes
Make sure your chocolate is finely chopped so it melts evenly when you mix it with the warm cream. And don’t skip on the heavy cream – it’s what gives these truffles that luxurious texture! Feel free to get creative with the toppings; crushed nuts add a delightful crunch, while coconut flakes bring a tropical twist. Let’s get ready to make some magic!
How to Prepare Classic & Chocolate Truffles
Now that we’ve got our ingredients ready, let’s get into the fun part – making these luscious Classic & Chocolate Truffles! Follow these steps, and you’ll have beautiful, homemade truffles that are sure to impress.
Step 1: Heat the Cream
First things first, grab a saucepan and pour in that glorious cup of heavy cream. Now, place it over medium heat and watch closely as it heats up. You want it to gently simmer – not boil! This is super important because simmering cream means it’s hot enough to melt the chocolate without burning it. You’ll see tiny bubbles forming around the edges, and that’s your cue to move on to the next step!
Step 2: Melt the Chocolate
Once your cream is simmering, remove it from the heat and add the chopped semi-sweet chocolate. I know the temptation is real, but resist the urge to dive in just yet. Give it a good stir with a spatula or a whisk until the chocolate is completely melted and the mixture is smooth and glossy. This is where the magic happens! If you see any stubborn bits of chocolate, let it sit for a minute before stirring again. Patience pays off, trust me!
Step 3: Add Flavor
Now comes the exciting part – let’s add that delicious vanilla extract! Pour in a teaspoon and mix it in well. This little addition elevates the flavor and makes your truffles taste even more decadent. Just imagine that rich chocolate combined with the warm notes of vanilla – pure bliss!
Step 4: Chill the Mixture
Alright, it’s time for our mixture to cool down. Transfer it to a bowl and pop it in the refrigerator for about 2 hours. This step is crucial because we want the mixture to firm up enough to scoop and roll into those delightful truffle balls. When it’s ready, it should be thick and hold its shape when you scoop it. So, set a timer and maybe grab a snack while you wait!
Step 5: Form the Truffles
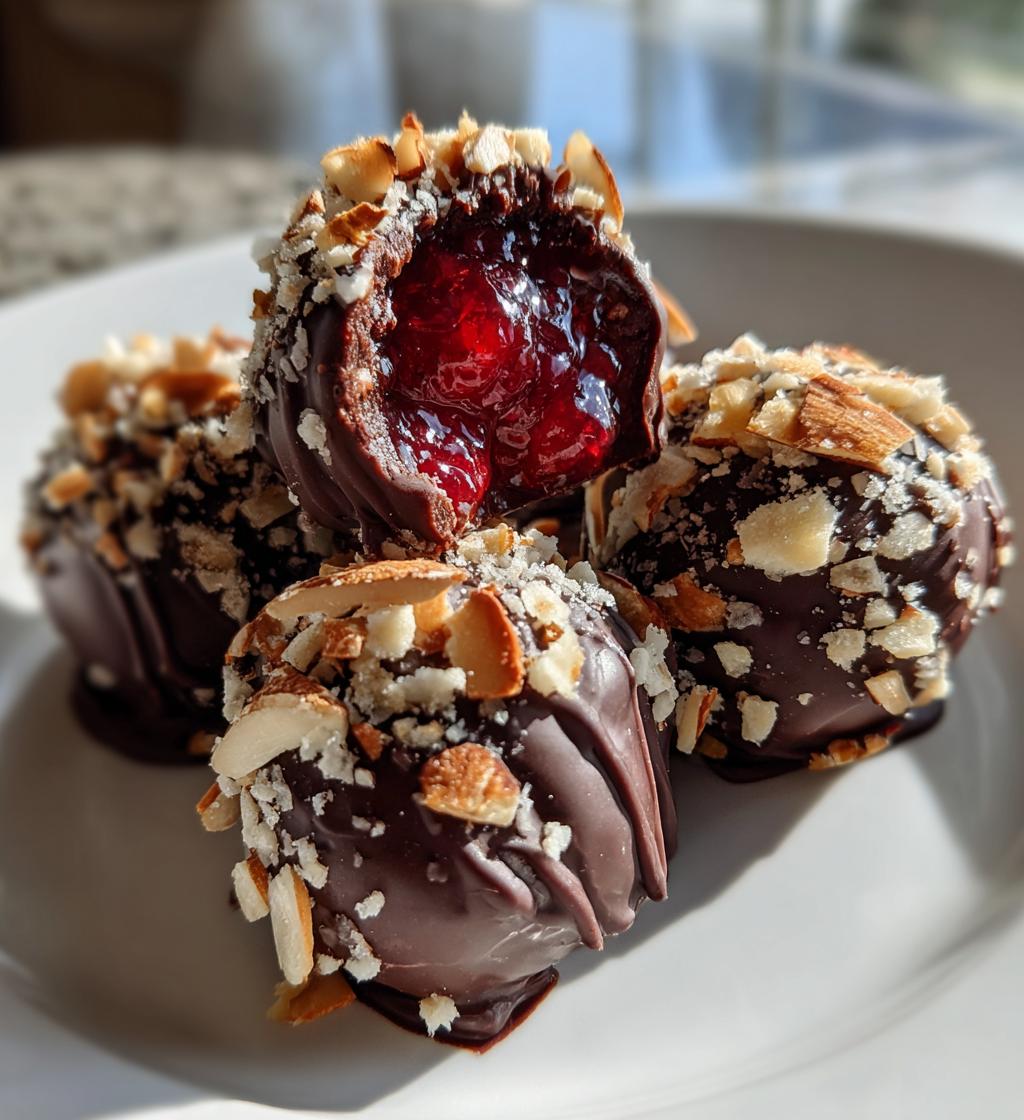
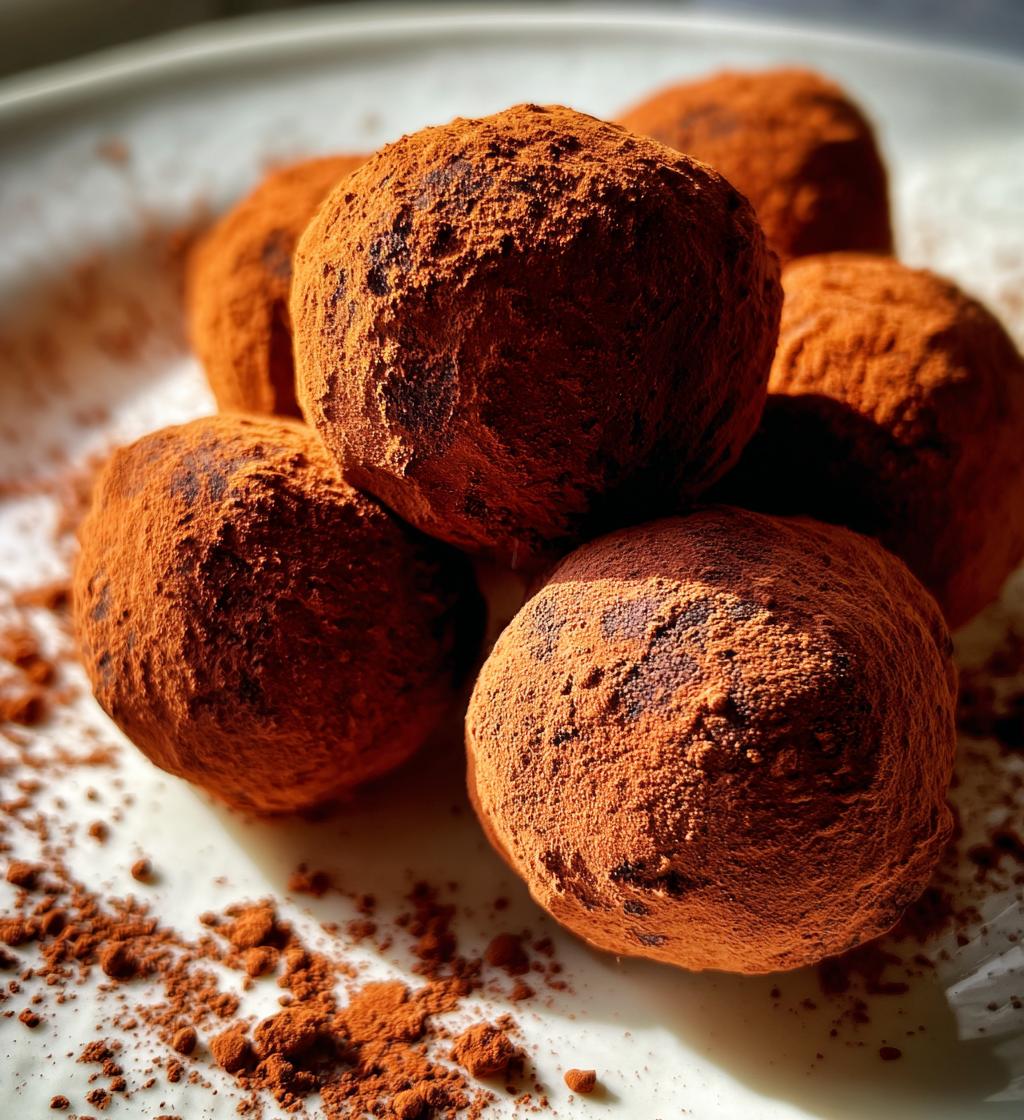
Now for the fun part! Use a melon baller or a spoon to scoop out small portions of the chilled chocolate mixture. Roll them between your palms to form beautiful little balls. Don’t worry about making them perfect; a bit of rustic charm is part of their appeal! Once rolled, you can dust them with cocoa powder or your choice of toppings like crushed nuts or coconut flakes. I love the contrast of the crunchy nuts with the smooth truffle – it’s like a little surprise in every bite!
Step 6: Set the Truffles
Finally, place your truffles on a baking sheet lined with parchment paper. Pop them back in the refrigerator for about 30 minutes to firm up completely. This will help them set nicely, and you can be sure they’ll hold their shape when you serve them. Once set, they’re ready to enjoy! You might want to taste one (or two) before sharing – I know I always do!
Why You’ll Love This Recipe
These Classic & Chocolate Truffles are truly a treat, and I can’t wait to share why you’ll fall head over heels for them:
- Quick Preparation Time: With just 20 minutes of hands-on time, you’ll be on your way to chocolate bliss in no time!
- No-Bake Method: There’s no oven required! This means less fuss and more fun as you whip up these indulgent treats.
- Decadent Flavor: The rich combination of semi-sweet chocolate and fresh cream creates a flavor experience that’s absolutely divine.
- Customizable: You can easily switch up the toppings or even the type of chocolate. Whether you like nuts, coconut, or just classic cocoa dusting, the possibilities are endless!
- Perfect for Any Occasion: These truffles are great for parties, gifts, or just treating yourself after a long day. Everyone will adore them!
- Impressive Yet Simple: You’ll wow your friends and family with your gourmet skills, and they’ll never guess how easy they were to make!
Trust me, once you try making these truffles, they’ll become your go-to dessert for every occasion!
Tips for Success
To make sure your Classic & Chocolate Truffles turn out perfectly every time, I’ve got some tried-and-true tips to share with you. These little nuggets of wisdom will help you avoid common pitfalls and elevate your truffle game!
Use Quality Chocolate
First and foremost, the chocolate you choose makes a huge difference! Always opt for high-quality semi-sweet chocolate. It melts beautifully and gives your truffles that rich flavor we all crave. Avoid chocolate chips, as they contain stabilizers that can lead to clumping. Trust me, using good chocolate will elevate your truffles to a whole new level!
Don’t Rush the Melting Process
When melting the chocolate with the cream, be patient! If you rush this step and the chocolate doesn’t fully melt, you might end up with a grainy texture instead of the smooth, velvety finish you’re after. Stir gently and allow the heat from the cream to do its job. If necessary, let it sit for a minute before stirring again to let the residual heat work its magic.
Chill for the Right Amount of Time
Chilling the mixture is crucial for forming those perfect truffle balls. If it’s too soft, you’ll have a gooey mess; if it’s too hard, you won’t be able to scoop it. Make sure to give it a full 2 hours in the fridge. But here’s a pro tip: If you’re in a hurry, you can pop it in the freezer for about 30 minutes instead. Just keep an eye on it!
Get Your Hands Dirty
When rolling the truffles, it’s totally okay to get your hands a little messy! This helps keep the chocolate from sticking to your palms. However, if you find the mixture is too sticky, a quick dusting of cocoa powder on your hands will work wonders. It’s a fun part of the process, and it means you’re getting closer to enjoying those delicious bites!
Experiment with Toppings
Feel free to get creative with your coatings! While cocoa powder is a classic choice, you can roll them in crushed nuts, shredded coconut, or even sprinkles for a fun twist. Just make sure to coat them right after rolling to ensure the toppings stick well. It’s all about personalizing your truffles to match your taste!
Serve at Room Temperature
For the best flavor experience, serve your truffles at room temperature. Take them out of the fridge about 15-20 minutes before you plan to enjoy them. The flavors will bloom, and the texture will be even more delightful. Trust me, your taste buds will thank you!
With these tips in your back pocket, you’re all set to create the most luxurious and satisfying Classic & Chocolate Truffles. Happy truffle-making!
Nutritional Information
So, let’s talk about what you’re getting in each delicious serving of these Classic & Chocolate Truffles! Keep in mind that these values are estimates, but they’ll give you a good idea of the rich goodness you’re indulging in. Each serving is for two truffles, which is honestly the perfect amount to satisfy that sweet tooth:
- Calories: 200
- Fat: 15g
- Saturated Fat: 9g
- Unsaturated Fat: 5g
- Trans Fat: 0g
- Cholesterol: 25mg
- Sodium: 10mg
- Carbohydrates: 20g
- Fiber: 2g
- Sugar: 15g
- Protein: 2g
These little bites of joy are definitely a treat, and they offer a delightful balance of flavors and textures. Just remember, moderation is key – but it’s okay to indulge once in a while! Enjoy every rich, chocolatey bite!
FAQ Section
Can I use different types of chocolate?
Absolutely! You can experiment with different types of chocolate for your truffles. Dark chocolate will give you a rich, intense flavor and a more sophisticated taste, while white chocolate offers a sweeter, creamier finish. Just keep in mind that the sweetness level and texture may change depending on what you choose. If you’re using dark chocolate, aim for something with at least 60% cocoa to maintain that lovely balance of flavors. Trust me, trying out different chocolates can lead to some delicious surprises!
How should I store my truffles?
To keep your Classic & Chocolate Truffles fresh and delicious, store them in an airtight container in the refrigerator. This helps maintain their texture and flavor. Just be sure to let them come to room temperature before serving for the best taste experience. If you want to keep them for longer, you can place a layer of parchment paper between the truffles to prevent them from sticking together. They’ll stay fresh for up to a week in the fridge – but I doubt they’ll last that long!
Can I freeze the truffles?
Yes, you can definitely freeze your truffles! Just make sure to store them in an airtight container or a zip-top freezer bag. I recommend placing a piece of parchment paper between layers to avoid any sticking. When you’re ready to enjoy them, simply take them out and let them thaw in the fridge for a few hours or at room temperature for about 30 minutes. Freezing doesn’t compromise the deliciousness, but it’s best enjoyed fresh if you can help it!
Storage & Reheating Instructions
Storing your Classic & Chocolate Truffles properly is key to keeping them fresh and delicious. After you’ve made your truffles and they’re fully set, transfer them to an airtight container. This will help lock in that rich chocolate flavor and creamy texture. You can keep them in the refrigerator for up to a week, but let’s be honest, they probably won’t last that long because they’re just too tasty!
If you find yourself with leftovers (or just want to make them ahead of time), these truffles can also be frozen! Just make sure they’re in a single layer on a baking sheet until they’re firm, then transfer them to an airtight container or a zip-top freezer bag. Place a layer of parchment paper between them to prevent sticking. They’ll stay good in the freezer for about 2-3 months. When you’re ready to indulge, simply move them to the fridge to thaw for a few hours, or let them sit at room temperature for about 30 minutes.
Reheating isn’t really necessary since they’re best enjoyed chilled or at room temperature. Just remember, if you do warm them up, keep it gentle to avoid melting. Enjoy your truffles fresh, and don’t forget to share (if you want to)!
Serving Suggestions
Now that you’ve made these delightful Classic & Chocolate Truffles, let’s talk about how to enjoy them to the fullest! These little treats are incredibly versatile, and I’ve got some fun ideas for serving them that will elevate any occasion.
- Perfect for Parties: Set up a beautiful dessert table at your next gathering and include a platter of your homemade truffles. They make a stunning centerpiece and are sure to impress your guests. You can even offer different toppings on the side for a fun DIY truffle experience!
- Gift Giving: Package your truffles in decorative boxes or tins for a heartfelt homemade gift. Whether it’s for birthdays, holidays, or just a sweet surprise, everyone loves receiving a box of homemade chocolates. Don’t forget to include a little handwritten note!
- Pair with Drinks: These truffles pair beautifully with a range of beverages. Try serving them alongside a rich cup of coffee or a glass of red wine for a luxurious experience. If you’re feeling adventurous, consider pairing them with a sweet dessert wine or even a sparkling wine for a touch of elegance.
- Movie Night Treat: Make your next movie night extra special by serving these truffles as a sweet snack. They’re the perfect bite-sized indulgence to enjoy while watching your favorite films. Just grab a few and settle in – you won’t be able to stop at just one!
- Special Occasions: Whether it’s a romantic dinner for two, a bridal shower, or a holiday celebration, these truffles are perfect for any special occasion. Their rich flavor and elegant look make them a fitting treat to celebrate life’s sweet moments.
With these serving suggestions, you’ll not only enjoy your Classic & Chocolate Truffles but also create memorable experiences for yourself and those you share them with. So get creative, and let the chocolatey goodness shine!
Print
Classic & Chocolate Truffles: 5 Reasons to Indulge Today
- Total Time: 2 hours 25 minutes
- Yield: 24 truffles 1x
- Diet: Vegetarian
Description
Delicious homemade classic and chocolate truffles.
Ingredients
- 1 cup heavy cream
- 8 oz semi-sweet chocolate, chopped
- 1 tsp vanilla extract
- Cocoa powder for dusting
- Optional toppings: crushed nuts, coconut flakes
Instructions
- Heat the cream in a saucepan until it just begins to simmer.
- Remove from heat and add the chopped chocolate.
- Stir until the chocolate is completely melted and smooth.
- Add the vanilla extract and mix well.
- Refrigerate the mixture for about 2 hours until firm.
- Use a melon baller or spoon to scoop out small portions.
- Roll into balls and dust with cocoa powder or desired toppings.
- Place on a baking sheet and refrigerate until set.
Notes
- Store truffles in the refrigerator.
- Allow truffles to come to room temperature before serving for best flavor.
- Prep Time: 20 minutes
- Cook Time: 5 minutes
- Category: Dessert
- Method: No-bake
- Cuisine: French
Nutrition
- Serving Size: 2 truffles
- Calories: 200
- Sugar: 15g
- Sodium: 10mg
- Fat: 15g
- Saturated Fat: 9g
- Unsaturated Fat: 5g
- Trans Fat: 0g
- Carbohydrates: 20g
- Fiber: 2g
- Protein: 2g
- Cholesterol: 25mg
Keywords: Classic Truffles, Chocolate Truffles, Homemade Truffles