Let me tell you, there’s something truly magical about a bowl of *Easy Chocolate Pudding*. It’s one of those desserts that just screams comfort. I mean, who doesn’t love diving into a silky, creamy treat that takes only minutes to whip up? Seriously, this pudding is like a warm hug in dessert form!
Growing up, my mom would often whip this up on a whim, and it became a staple in our house. I can still picture her, standing over the stove, stirring away and humming to herself, as the rich chocolatey aroma filled the kitchen. It felt like a special occasion every time we had it, even if it was just a Tuesday evening. There’s just something about that smooth texture and deep chocolate flavor that makes everything feel a little brighter.
What I love most is how quick it is to prepare—just ten minutes of cooking and a little chilling time, and you’ve got yourself a dessert that can impress anyone! No fancy equipment or complicated techniques, just simple ingredients coming together to create pure bliss. Trust me, once you try this pudding, you’ll be hooked!
Ingredients List
Here’s what you’ll need to make this decadent *Easy Chocolate Pudding*. Gather these simple ingredients, and you’ll be well on your way to dessert heaven:
- 2 cups milk
- 1/2 cup sugar
- 1/3 cup unsweetened cocoa powder
- 1/4 cup cornstarch
- 1/4 teaspoon salt
- 1 teaspoon vanilla extract
- 2 tablespoons butter
These ingredients come together beautifully, so don’t worry about hunting for anything fancy. Just good, honest staples that you probably already have in your pantry or fridge! I love how straightforward this list is. You can almost taste the rich, chocolaty goodness just by reading it! Let’s get cooking!
How to Prepare Easy Chocolate Pudding
Now, let’s dive into the simple steps to create this delightful *Easy Chocolate Pudding*. You’ll see just how easy it is to make a dessert that feels indulgent without the fuss! Get ready to whisk your way to chocolatey goodness!
Step-by-Step Instructions
- Combine the Dry Ingredients: In a medium saucepan over low heat, mix together the sugar, cocoa powder, cornstarch, and salt. Give it a good stir so everything is evenly combined. This is where the magic begins!
- Add the Milk: Gradually pour in the milk while stirring constantly to avoid any lumps. It’s super important to keep stirring to get that smooth texture we all love. Trust me, it’s worth the extra effort!
- Cook Until Thickened: Increase the heat to medium, and keep stirring until the mixture thickens and starts to bubble. This will take about 5-7 minutes. You’ll notice it becoming creamy and luscious—that’s when the excitement really kicks in!
- Finish with Flavor: Once it’s thickened, remove the saucepan from the heat. Stir in the vanilla extract and butter until both are fully melted and incorporated. The smell will be heavenly, I promise!
- Chill the Pudding: Pour the warm pudding into your serving dishes. I like to use cute little ramekins, but any dish will do. Cover them with plastic wrap (press it directly onto the surface to prevent a skin from forming) and pop them in the fridge. Let them chill for at least 2 hours, or until set. Patience is key here, but it’s so worth the wait!
And there you have it! Just a few simple steps and a little bit of patience, and you’ll be ready to enjoy your creamy, dreamy *Easy Chocolate Pudding*. I can’t wait for you to taste it! It’s like a little bowl of happiness waiting for you in the fridge.
Tips for Success
Now that you’re all set to make your *Easy Chocolate Pudding*, let me share some pro tips that’ll ensure you whip up a perfect batch every single time. Trust me, a little know-how goes a long way when it comes to achieving that creamy, dreamy texture!
Use Fresh Ingredients
Fresh ingredients make a world of difference! Always use fresh milk and high-quality cocoa powder. I swear by the richness of Dutch-processed cocoa; it gives the pudding a deeper chocolate flavor that’s absolutely divine. Learn more about Dutch-processed cocoa here.
Stir Constantly
This step can’t be stressed enough! Stirring constantly while adding the milk and while it cooks helps prevent lumps and ensures a silky-smooth pudding. I know it can be tempting to take a break, but hang in there! Your arms will thank you later when you dig into that smooth, lump-free dessert.
Don’t Rush the Cooking Process
Take your time through the cooking process. If the heat is too high, you might end up with a pudding that’s scorched at the bottom or too thick. Medium heat is your best friend here. Plus, watching it transform from a mixture to a luscious pudding is part of the fun!
Chill Properly
Letting the pudding chill in the fridge is crucial. Not only does this help it set perfectly, but it also allows the flavors to meld together beautifully. I like to make mine a day ahead when I can—trust me, it’s even better after a night in the fridge!
Experiment with Toppings
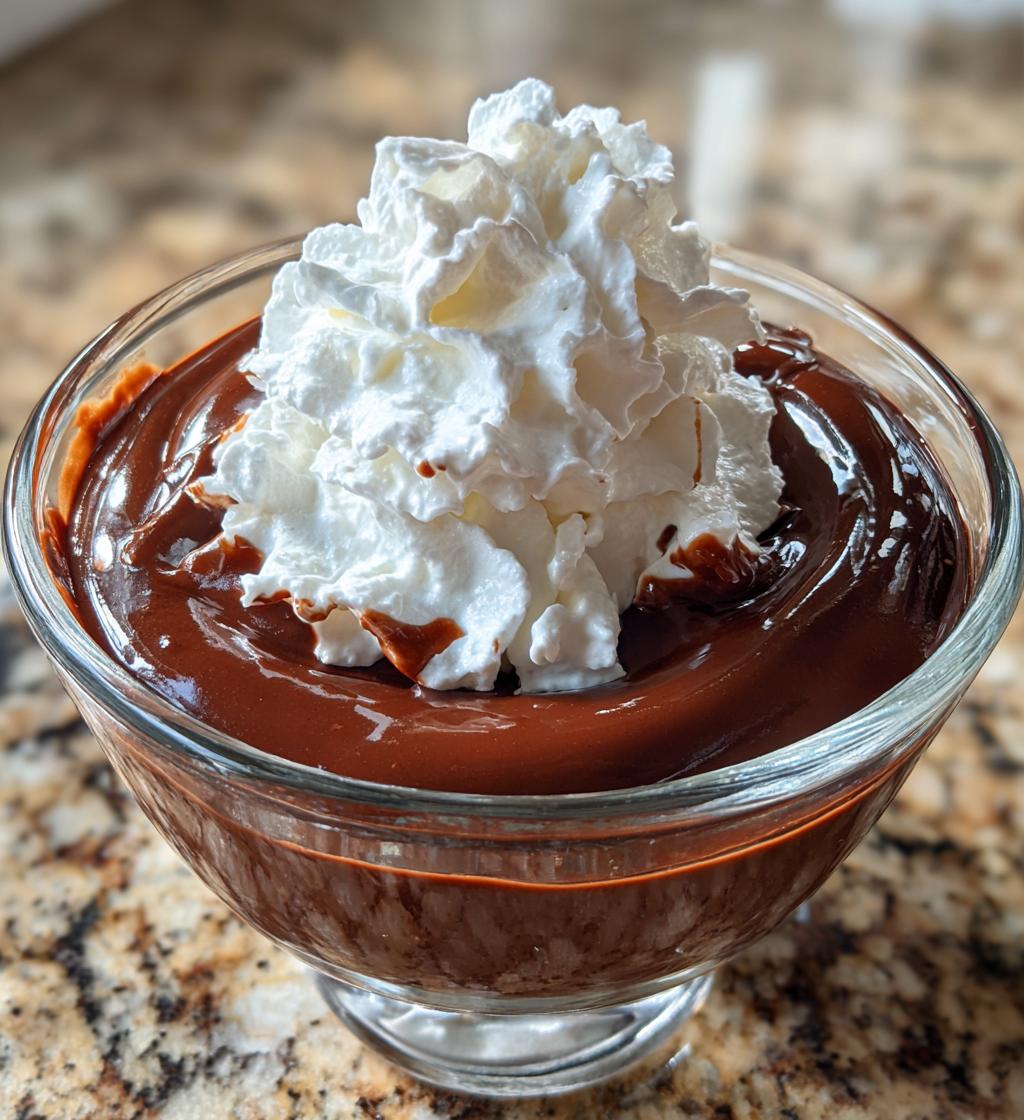
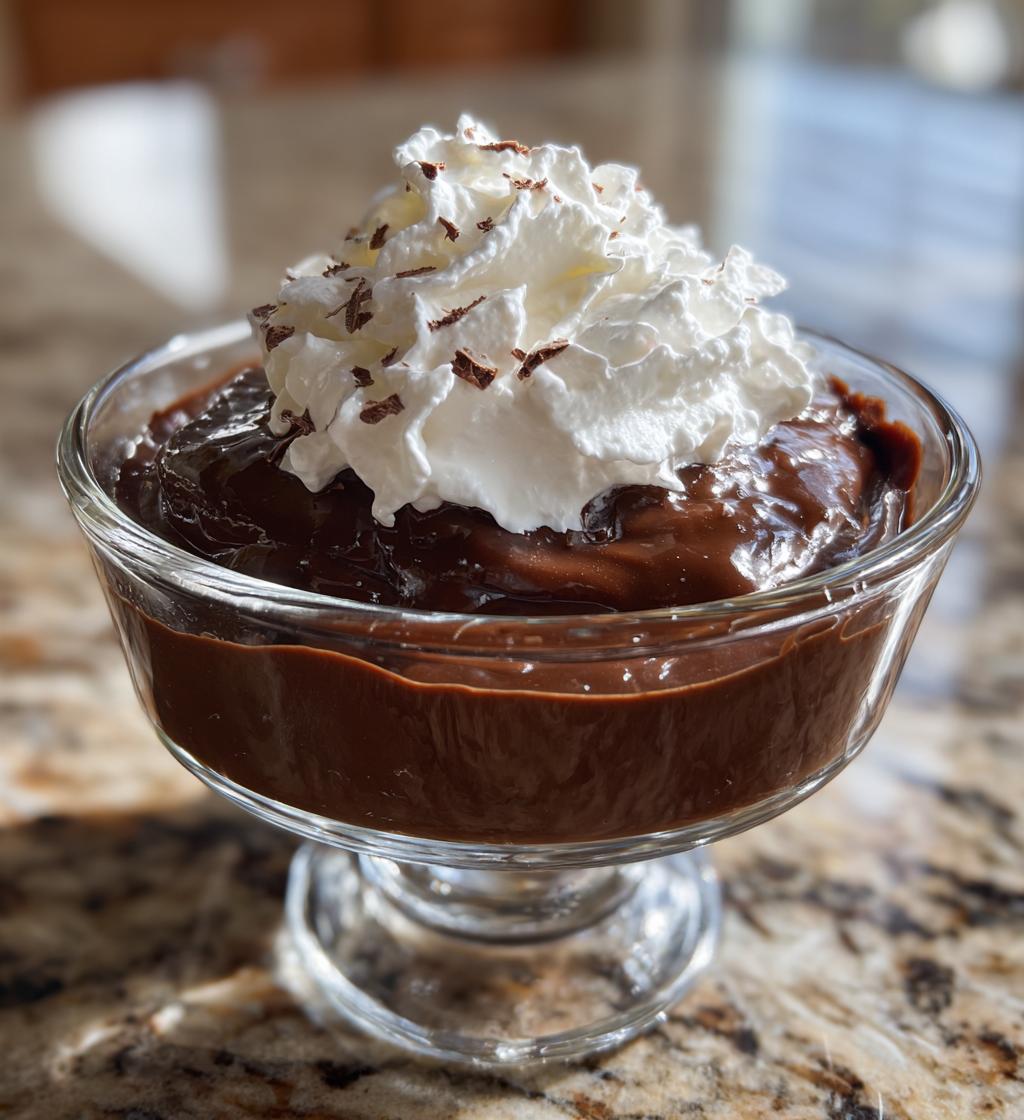
While the pudding is fantastic on its own, don’t be afraid to get a little creative with toppings! Whipped cream, chocolate shavings, or even a sprinkle of sea salt can elevate your pudding to a whole new level. I love adding a dollop of whipped cream with a sprinkle of crushed cookies on top for some extra flair!
With these tips, you’ll be on your way to creating the best *Easy Chocolate Pudding* ever. Enjoy the process, and happy cooking! You’re going to absolutely love this dessert!
Variations
Now that you’ve mastered the classic *Easy Chocolate Pudding*, let’s have some fun with variations! This dessert is super versatile, and you can jazz it up in so many delicious ways. Here are a few ideas to get your creative juices flowing:
Flavor Infusions
If you’re feeling adventurous, try adding different flavor extracts to your pudding! A splash of almond extract or peppermint extract can give it a delightful twist. Just start with a teaspoon and taste as you go—it’s amazing how a little bit can transform the whole dessert!
Chocolate Lovers Delight
For the ultimate chocolate experience, mix in some chocolate chips after you’ve removed the pudding from heat. They’ll melt into the warm pudding, creating pockets of gooey chocolate throughout. You can use semi-sweet, dark, or even white chocolate chips for a fun contrast!
Fruit Additions
Want to lighten things up a bit? Stir in some mashed bananas or pureed strawberries after removing from heat. This not only adds natural sweetness but also gives your pudding a fruity flair. You can even layer it with fresh fruit in your serving dishes for a beautiful presentation!
Nutty Crunch
If you enjoy a bit of texture, sprinkle in some chopped nuts, like walnuts or pecans, before chilling. They add a delightful crunch that contrasts beautifully with the smooth pudding. You can also top your pudding with a handful of toasted nuts for an extra crunch when serving!
Decadent Toppings
And let’s talk toppings! While whipped cream is a classic choice, don’t shy away from other options. Try caramel sauce drizzled on top for a sweet and salty combination, or scatter some shaved chocolate or coconut flakes over the pudding for an exotic touch. A sprinkle of sea salt can also enhance the chocolate flavor—trust me, it’s a game-changer!
With these variations, you can truly make the *Easy Chocolate Pudding* your own. So go ahead and experiment—each version is bound to be a hit at your table! Enjoy the delightful journey of flavors!
Storage & Reheating Instructions
Now that you’ve made your delightful *Easy Chocolate Pudding*, you might be wondering how to store any leftovers (if there are any!). No worries, I’ve got you covered!
To keep your pudding fresh, simply cover each serving dish tightly with plastic wrap or transfer it to an airtight container. It’ll stay good in the fridge for about 3-4 days. Just make sure to press the wrap directly onto the surface of the pudding to prevent that pesky skin from forming. Nobody wants that!
If you find yourself with leftovers that you want to enjoy later, just take them out of the fridge and give them a little stir before serving. The texture might thicken a bit after chilling, but stirring it will bring back that creamy consistency.
Now, if you’re thinking about reheating the pudding, here’s the trick: do it gently! Pop it in the microwave for about 15-20 seconds at a time, stirring in between until it’s warmed through. You might want to add a splash of milk to loosen it up slightly and keep that velvety smoothness intact. Just be careful not to overheat it—nobody wants a hot chocolate pudding! Trust me, this gentle approach helps maintain that luscious texture we all love.
With these storage and reheating tips, you can enjoy your *Easy Chocolate Pudding* whenever the craving strikes! Happy indulging!
Nutritional Information
So, if you’re curious about what’s in your delightful *Easy Chocolate Pudding*, here’s a breakdown of the estimated nutritional values per serving. Keep in mind, these are just estimates, but they’ll give you a good idea of what to expect:
- Calories: 220
- Fat: 7g
- Saturated Fat: 4g
- Unsaturated Fat: 2g
- Trans Fat: 0g
- Cholesterol: 20mg
- Sodium: 150mg
- Carbohydrates: 38g
- Fiber: 2g
- Sugar: 22g
- Protein: 4g
This creamy treat packs a decent punch in the flavor department while still being a sweet indulgence. It’s always nice to know what you’re savoring, right? Enjoy every delicious spoonful of your *Easy Chocolate Pudding* guilt-free!
FAQ Section
Got questions about making the perfect *Easy Chocolate Pudding*? Don’t worry, I’ve got you covered with some common queries and answers that’ll help you navigate this delightful dessert!
Can I make this pudding dairy-free?
Absolutely! You can easily swap out the regular milk for your favorite dairy-free alternative, like almond milk, soy milk, or oat milk. Just make sure to choose a variety that’s unsweetened to keep the flavors balanced. The pudding will still turn out creamy and delicious!
What can I use instead of cornstarch?
If you find yourself out of cornstarch, you can substitute it with an equal amount of arrowroot powder or all-purpose flour. Just keep in mind that using flour might give the pudding a slightly different texture, but it will still work! Make sure to cook it a bit longer to fully dissolve the flour.
How can I make this pudding richer?
For an extra indulgent twist, consider adding an additional tablespoon of butter or even a splash of heavy cream when you mix in the vanilla. This little addition will elevate the creaminess and give you that luxurious feel with each spoonful!
Can I make this pudding ahead of time?
Yes, you can! In fact, I often recommend making it a day ahead. The flavors develop beautifully as it chills in the fridge, and the texture becomes even smoother. Just cover it tightly to keep it fresh, and you’ll have a delightful dessert ready when you are!
What’s the best way to serve this pudding?
Serving *Easy Chocolate Pudding* can be as simple or as fancy as you like! I love putting it in individual ramekins for a fun presentation. Top it off with a dollop of whipped cream, some chocolate shavings, or fresh berries for a burst of color and flavor. You can even serve it with a side of cookies for added crunch—yum!
With these FAQs, you should feel more confident in your chocolate pudding-making journey. Enjoy every sweet moment, and don’t hesitate to get creative with your puddings! Happy cooking!
Why You’ll Love This Recipe
- Quick & Easy: In just 20 minutes, you can whip up a delicious dessert without any complicated techniques. Perfect for when you need a sweet fix fast!
- Creamy Texture: This pudding is the epitome of creaminess, making every spoonful a delight. You won’t be able to resist its velvety goodness!
- Simple Ingredients: With just a handful of pantry staples, you can create something indulgent and satisfying. No need for fancy ingredients!
- Customizable: Feel free to play around with flavors and toppings to make it your own. Whether you like it classic or with a twist, this pudding can adapt to your cravings!
- Perfect for Any Occasion: Whether it’s a weeknight treat or a special celebration, this *Easy Chocolate Pudding* is sure to impress everyone at the table.
- Kid-Friendly: Kids love chocolate, and this recipe is a fantastic way to get them involved in the kitchen. They’ll have a blast helping you make it!
- Make-Ahead Friendly: You can prepare this pudding in advance, allowing the flavors to develop and making it a stress-free dessert option for gatherings.

Easy Chocolate Pudding: 10 Minutes to Pure Bliss
- Total Time: 20 minutes
- Yield: 4 servings 1x
- Diet: Vegetarian
Description
A simple and creamy chocolate pudding recipe.
Ingredients
- 2 cups milk
- 1/2 cup sugar
- 1/3 cup unsweetened cocoa powder
- 1/4 cup cornstarch
- 1/4 teaspoon salt
- 1 teaspoon vanilla extract
- 2 tablespoons butter
Instructions
- In a saucepan, combine sugar, cocoa powder, cornstarch, and salt.
- Add milk gradually, stirring constantly until smooth.
- Cook over medium heat, stirring until the mixture thickens and starts to boil.
- Remove from heat and stir in vanilla and butter.
- Pour into serving dishes and refrigerate until set.
Notes
- Serve chilled for best taste.
- Can be topped with whipped cream.
- Store leftovers in the refrigerator.
- Prep Time: 10 minutes
- Cook Time: 10 minutes
- Category: Dessert
- Method: Stovetop
- Cuisine: American
Nutrition
- Serving Size: 1 serving
- Calories: 220
- Sugar: 22g
- Sodium: 150mg
- Fat: 7g
- Saturated Fat: 4g
- Unsaturated Fat: 2g
- Trans Fat: 0g
- Carbohydrates: 38g
- Fiber: 2g
- Protein: 4g
- Cholesterol: 20mg
Keywords: Easy Chocolate Pudding