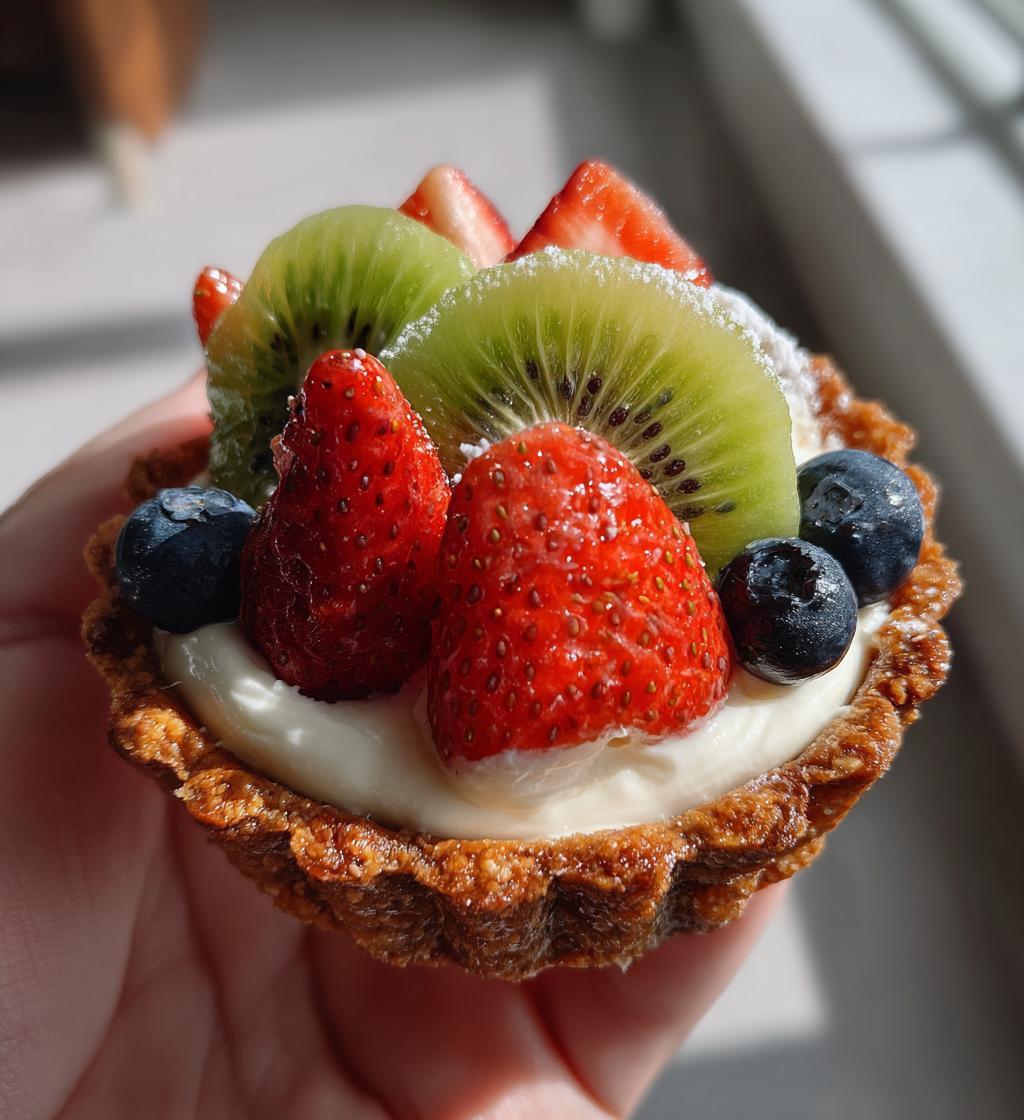
Oh, let me tell you about my love affair with fruit tarts! It all started one sunny afternoon in my grandmother’s kitchen, surrounded by the vibrant colors of fresh berries and the sweet scent of pastry cream. I remember the joy on her face as she carefully arranged the fruit, her hands as gentle as a whisper. That moment ignited a passion in me for creating desserts that bring people together. There’s something magical about a fruit tart, isn’t there? It’s not just a dessert; it’s a celebration of flavors, colors, and textures that can brighten any occasion.
Now, when I whip up a Fruit Tart with Pastry Cream, I feel that same excitement bubbling up inside me. The smooth, creamy filling paired with a medley of fresh fruits is simply irresistible. Plus, it’s surprisingly easy to make! Whether it’s a birthday party, a picnic with friends, or just a cozy night in, this tart is the perfect treat to impress your loved ones. Trust me, once you try this recipe, you’ll be reaching for your mixing bowl and tart shell every chance you get! Let’s dive into the delightful world of fruit tarts together!
Ingredients for Fruit Tart with Pastry Cream
Gathering the right ingredients is the first step to creating your masterpiece! Here’s what you’ll need to whip up this stunning Fruit Tart with Pastry Cream:
- 1 pre-made tart shell: You can find these at your local grocery store, and they save you a ton of time in the kitchen! Just make sure to choose one that’s sturdy enough to hold all that delicious filling and fruit.
- 1 cup pastry cream: This is where the magic happens! You can use store-bought pastry cream for convenience, but if you’re feeling adventurous, making your own adds a delightful richness that’s truly worth it.
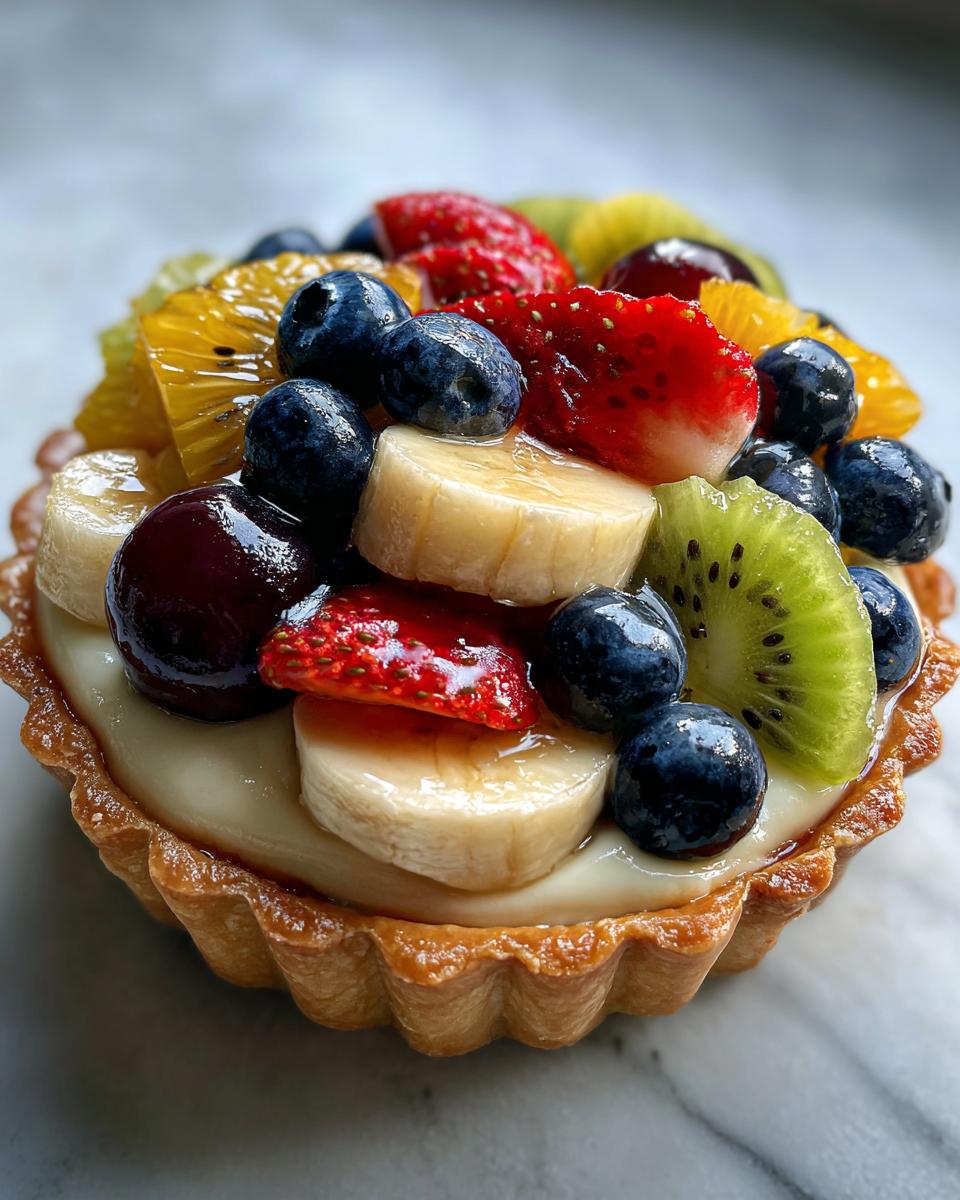
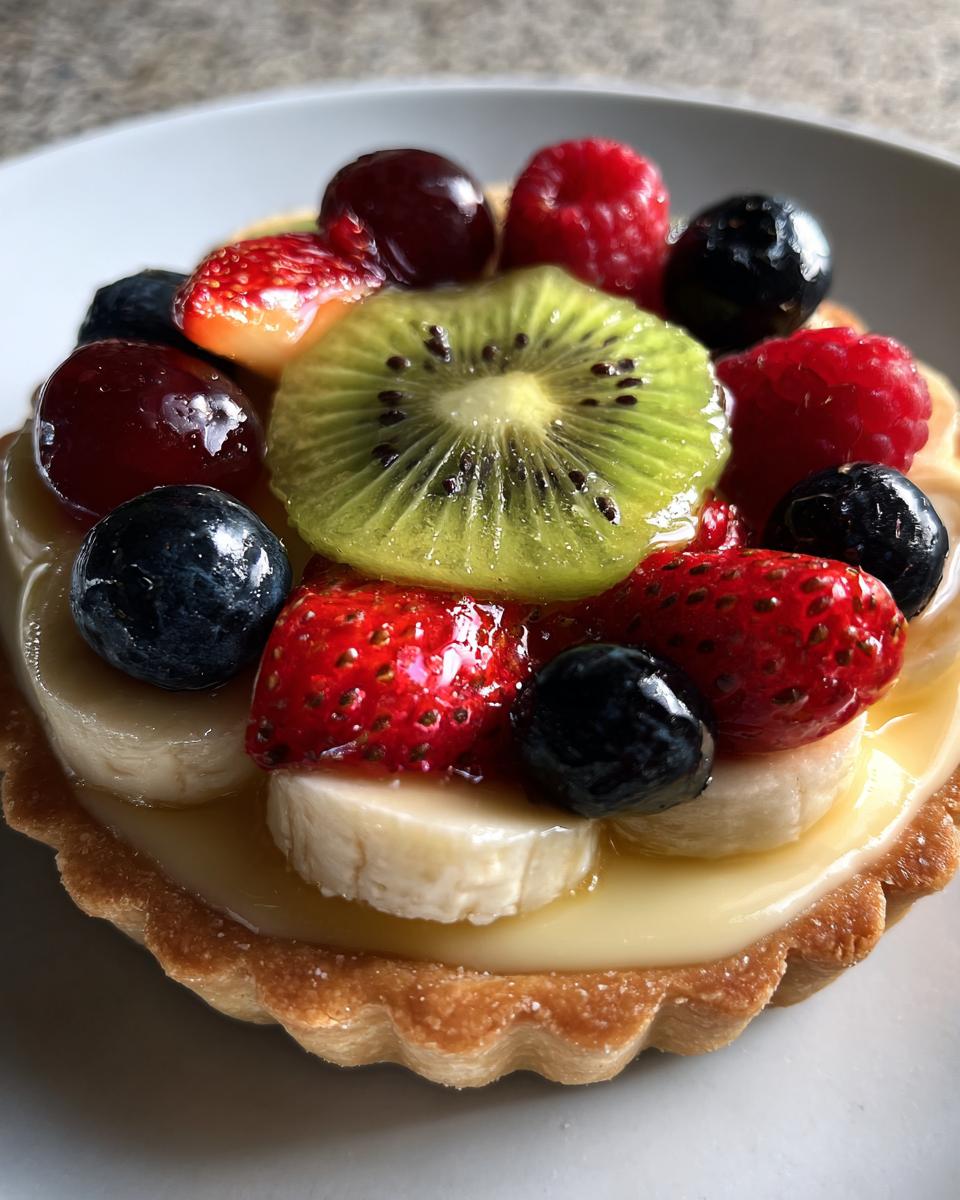
- 1 cup mixed fresh fruit: Go for a colorful mix to make your tart pop! I love using berries like strawberries, blueberries, and raspberries, along with slices of kiwi and banana for that sweet, tropical touch. Feel free to get creative with whatever fruits are in season!
- 1/4 cup fruit glaze: This glossy finish not only adds a beautiful shine to your tart but also helps keep the fruit fresh and vibrant. You can find it in the baking aisle or make your own with apricot preserves mixed with a splash of water.
With these fresh and flavorful ingredients, you’re on your way to creating a stunning dessert that will wow anyone lucky enough to share it with you!
How to Prepare Fruit Tart with Pastry Cream
Now, let’s get to the fun part – putting together your Fruit Tart with Pastry Cream! It’s a simple process, but it’s all about taking your time and enjoying each step. Here’s how to do it:
Prepare the Tart Shell
First things first, you’ll want to get that pre-made tart shell ready. Follow the package instructions closely – they usually involve a little pre-baking to ensure it’s nice and golden. I always recommend using a fork to poke a few holes in the bottom. This helps prevent that pesky puffing up that can happen. Patience is key here! Let it cool completely on a wire rack before you fill it. If it’s even slightly warm, your pastry cream could melt, and we definitely don’t want that!
Fill the Tart Shell
Once your tart shell is cool, it’s time to fill it with that luscious pastry cream. If you’re using store-bought cream, give it a good stir to smooth it out before you spread it in. I like to use a spatula to help me get an even layer. Start from the center and gently push the cream to the edges. Make it as smooth as possible – this is your canvas for the fruit! Don’t rush this step; a perfectly filled tart is what makes all the difference.
Arrange the Mixed Fruit
Okay, here’s where you can let your creativity shine! Grab your mixed fresh fruit and start arranging it on top of the pastry cream. I like to lay down the larger fruits first, like banana slices and kiwis, and then fill in the gaps with berries. Go for a rainbow effect if you can! It not only looks stunning but also ensures every bite is packed with flavor. Don’t be afraid to overlap the fruits a little; it adds to that inviting, abundant look!
Apply the Fruit Glaze
Now, let’s make that tart sparkle! Take your fruit glaze and gently brush it over the fruit with a pastry brush. This not only gives it a beautiful shine but also helps to keep everything fresh and intact. Just be careful not to drown the fruit; a light touch is all you need here. If you’re making your own glaze, make sure it’s cooled down a bit before applying it, or it might warm the fruit too much.
Chill the Tart
Finally, it’s time to chill your masterpiece! Place your assembled tart in the refrigerator for at least 30 minutes. This step is crucial because it helps the pastry cream set a bit more and allows those flavors to meld beautifully. Trust me, the wait will be worth it when you take that first slice! After chilling, you’re ready to serve up a slice of joy to your friends and family. Enjoy every moment of it!
Why You’ll Love This Fruit Tart with Pastry Cream
This Fruit Tart with Pastry Cream is a crowd-pleaser for so many reasons! Here’s why you’ll adore making and sharing it:
- Quick preparation time: With the help of a pre-made tart shell and simple steps, you can whip this up in no time. It’s perfect for those last-minute dessert cravings!
- Easy to make: Even if you’re not a baking whiz, this recipe is straightforward and forgiving. I promise you don’t need to be a pro to create something beautiful!
- Fresh and flavorful: The combination of creamy pastry cream and vibrant fresh fruits creates a burst of flavor in every bite. It’s like a celebration of freshness on a plate!
- Visually appealing: Just look at those gorgeous colors! This tart is a feast for the eyes and makes a stunning centerpiece for any gathering.
- Great for gatherings: Whether it’s a birthday party, a picnic, or a cozy get-together, this tart is always a hit. Everyone loves a slice of this deliciousness, and it’s sure to impress your guests!
Trust me, once you see the smiles on your friends’ faces, you’ll be hooked on making this delightful dessert again and again!
Tips for Success with Your Fruit Tart
To make sure your Fruit Tart with Pastry Cream turns out perfectly every time, I’ve got a few tried-and-true tips that will help you shine in the kitchen. Let’s dive right in!
Choose Quality Ingredients
Start with the freshest ingredients you can find. Seasonal fruits not only taste better but also look more vibrant on your tart. If you’re not sure what to use, ask your local farmer’s market vendor for their recommendations. Freshness is key!
Make Your Own Pastry Cream
If you have the time, I highly recommend making your own pastry cream instead of store-bought. It’s surprisingly easy and adds a deeper, richer flavor to your tart. Plus, you can customize it by adding a splash of vanilla extract or a hint of lemon zest for extra zing!
Don’t Rush the Chilling Time
Patience pays off when it comes to chilling your tart. Give it at least 30 minutes in the fridge, but if you can wait longer, do it! The flavors meld beautifully, and the pastry cream will set up perfectly. You want that smooth, creamy texture when you slice into it!
Watch the Glaze Application
When you brush on the fruit glaze, use a light hand. A little goes a long way! You want a nice shine without drowning the fruit. If you notice your glaze is too thick, just add a splash of water to thin it out. It should glide over the fruit like silk!
Experiment with Different Fruits
Feel free to get creative with your fruit choices! While I love the classic mix of berries, kiwi, and banana, you can try mango, peaches, or even citrus segments for a unique twist. Just keep in mind that some fruits, like bananas, may brown quickly, so consider adding them just before serving.
Practice Makes Perfect
Lastly, don’t stress if your first tart doesn’t look Instagram-perfect! The beauty of homemade desserts is in their imperfections. The more you make this tart, the better you’ll get at arranging the fruit and filling the shell. Enjoy the process, and don’t forget to taste as you go!
With these tips, you’ll be well on your way to creating an impressive Fruit Tart with Pastry Cream that’ll wow your friends and family. Happy baking!
Nutritional Information
Understanding the nutritional values of your Fruit Tart with Pastry Cream is important, especially if you’re keeping an eye on your diet. Here’s a breakdown of what to expect per serving (1 slice):
- Calories: 250
- Fat: 10g
- Saturated Fat: 5g
- Unsaturated Fat: 3g
- Trans Fat: 0g
- Cholesterol: 25mg
- Sodium: 100mg
- Carbohydrates: 35g
- Fiber: 2g
- Sugar: 15g
- Protein: 3g
Please note that these values are estimates and can vary based on specific ingredients and portion sizes. It’s always a good idea to adjust based on your needs and preferences. Enjoy your delicious creation guilt-free!
FAQ about Fruit Tart with Pastry Cream
Got questions about making your Fruit Tart with Pastry Cream? No worries! I’ve gathered some of the most common queries and their answers to help you along your baking journey.
How should I store leftovers?
If you happen to have any leftover tart (which is rare, but hey, it happens!), store it in the refrigerator. Just cover it gently with plastic wrap or place it in an airtight container to keep the fruit fresh. It’ll stay good for about 2-3 days. Just keep in mind that the crust may get a bit softer over time, but the flavors will still be delicious!
Can I use frozen fruit for this recipe?
While fresh fruit gives the best flavor and texture, you can use frozen fruit in a pinch. Just make sure to thaw it completely and pat it dry to remove excess moisture. Otherwise, you might end up with a soggy tart. I recommend using frozen berries if you go this route; they hold up pretty well!
What other fruits can I use?
The beauty of this tart is its versatility! You can mix and match fruits based on your preferences and what’s in season. Think peaches, mangoes, or even citrus segments like oranges and grapefruits for a refreshing twist. Just remember to cut them into bite-sized pieces for easy serving!
How can I make my own pastry cream?
Making your own pastry cream is super easy and adds a lovely homemade touch! Simply whisk together 2 cups of milk, 1/2 cup of sugar, 1/4 cup of cornstarch, and 4 egg yolks in a saucepan. Cook over medium heat, stirring constantly until it thickens. Then, add a splash of vanilla extract and let it cool before using. Trust me, it’s worth the extra effort!
Can I make this tart ahead of time?
Absolutely! You can prepare the tart shell and pastry cream a day in advance. Just store them separately in the fridge until you’re ready to assemble. I recommend adding the fruit and glaze just before serving to keep everything fresh and vibrant. That way, your tart looks and tastes its best!
What if my pastry cream is too thick or lumpy?
If your pastry cream turns out too thick, you can whisk in a little milk until it reaches your desired consistency. If it’s lumpy, just give it a good whisk or pass it through a fine-mesh sieve to smooth it out. No one wants a lumpy cream in their tart!
With these answers, I hope you feel more confident about making your Fruit Tart with Pastry Cream. Happy baking, and enjoy every delicious bite!
Serving Suggestions for Fruit Tart
Now that you’ve created a stunning Fruit Tart with Pastry Cream, let’s talk about how to elevate the experience even further! There’s nothing like pairing this delightful dessert with just the right accompaniments to make it truly unforgettable.
Freshly brewed coffee or tea: I can’t recommend this enough! A steaming cup of coffee or a fragrant herbal tea complements the sweetness of the tart beautifully. The warm beverage balances the cool, creamy pastry cream and bright fruit flavors, creating a perfectly cozy moment.
A scoop of vanilla ice cream: If you want to take it up a notch, serve your tart with a generous scoop of creamy vanilla ice cream. The rich, velvety texture of the ice cream against the tart’s crisp shell and luscious filling is pure bliss. You can even try other flavors like coconut or caramel for a fun twist!
Whipped cream: For an extra touch of decadence, a dollop of freshly whipped cream on the side can’t be beat. Whip it up with a bit of powdered sugar and vanilla for a hint of sweetness that enhances the overall flavor profile of your tart.
Fresh mint leaves: Don’t forget about garnishing! A few fresh mint leaves on top of the tart or as a garnish on the plate adds a pop of color and a refreshing aroma. It’s a small touch that makes a big difference in presentation.
Fruit compote: If you want to get fancy, drizzle a bit of fruit compote on the plate. A simple mixture of heated berries with a splash of lemon juice and sugar creates a delightful sauce that complements the tart perfectly and adds a burst of flavor.
These serving suggestions not only enhance the Fruit Tart with Pastry Cream, but they also create a charming presentation that’s sure to impress your guests. So go ahead, set the scene, and enjoy every delightful bite together!
Storage & Reheating Instructions
After indulging in your delicious Fruit Tart with Pastry Cream, you might find yourself with some leftovers (if you’re lucky!). Here’s how to store them properly to keep that fresh flavor and texture intact.
Storing Leftovers
First off, make sure to cover your tart gently with plastic wrap or place it in an airtight container. This will help prevent any unwanted odors from the fridge from seeping in and affecting the taste of your tart. Ideally, it’s best to store the tart in the refrigerator for up to 2-3 days. Just keep in mind that the crust may become a bit softer over time, but the delightful flavors will still shine through.
Reheating Tips
Now, if you’re thinking about reheating it, I’d recommend against using the microwave, as it can make the crust soggy and ruin that lovely texture you worked so hard to achieve. Instead, consider serving it cold, as it’s just as delicious that way! If you really want to warm it up, try placing individual slices in a preheated oven at 350°F (175°C) for about 5-10 minutes. Just keep an eye on it to avoid overdoing it!
With these simple storage and reheating tips, your Fruit Tart with Pastry Cream will stay as delightful as the day you made it. Enjoy every last bite, whether it’s fresh out of the fridge or gently warmed up!

Fruit Tart with Pastry Cream: 5 Irresistible Tips to Enjoy
- Total Time: 50 minutes
- Yield: 8 servings 1x
- Diet: Vegetarian
Description
A delicious fruit tart topped with smooth pastry cream.
Ingredients
- 1 pre-made tart shell
- 1 cup pastry cream
- 1 cup mixed fresh fruit (berries, kiwi, banana)
- 1/4 cup fruit glaze
Instructions
- Prepare the tart shell according to package instructions.
- Fill the cooled tart shell with pastry cream.
- Arrange the mixed fruit on top of the pastry cream.
- Brush the fruit with fruit glaze to add shine.
- Chill in the refrigerator for at least 30 minutes before serving.
Notes
- Use seasonal fruits for the best flavor.
- Make your own pastry cream for a richer taste.
- Store leftovers in the refrigerator.
- Prep Time: 20 minutes
- Cook Time: 30 minutes
- Category: Dessert
- Method: Baking
- Cuisine: French
Nutrition
- Serving Size: 1 slice
- Calories: 250
- Sugar: 15g
- Sodium: 100mg
- Fat: 10g
- Saturated Fat: 5g
- Unsaturated Fat: 3g
- Trans Fat: 0g
- Carbohydrates: 35g
- Fiber: 2g
- Protein: 3g
- Cholesterol: 25mg
Keywords: Fruit Tart, Pastry Cream, Dessert, Fruit Tart Recipe