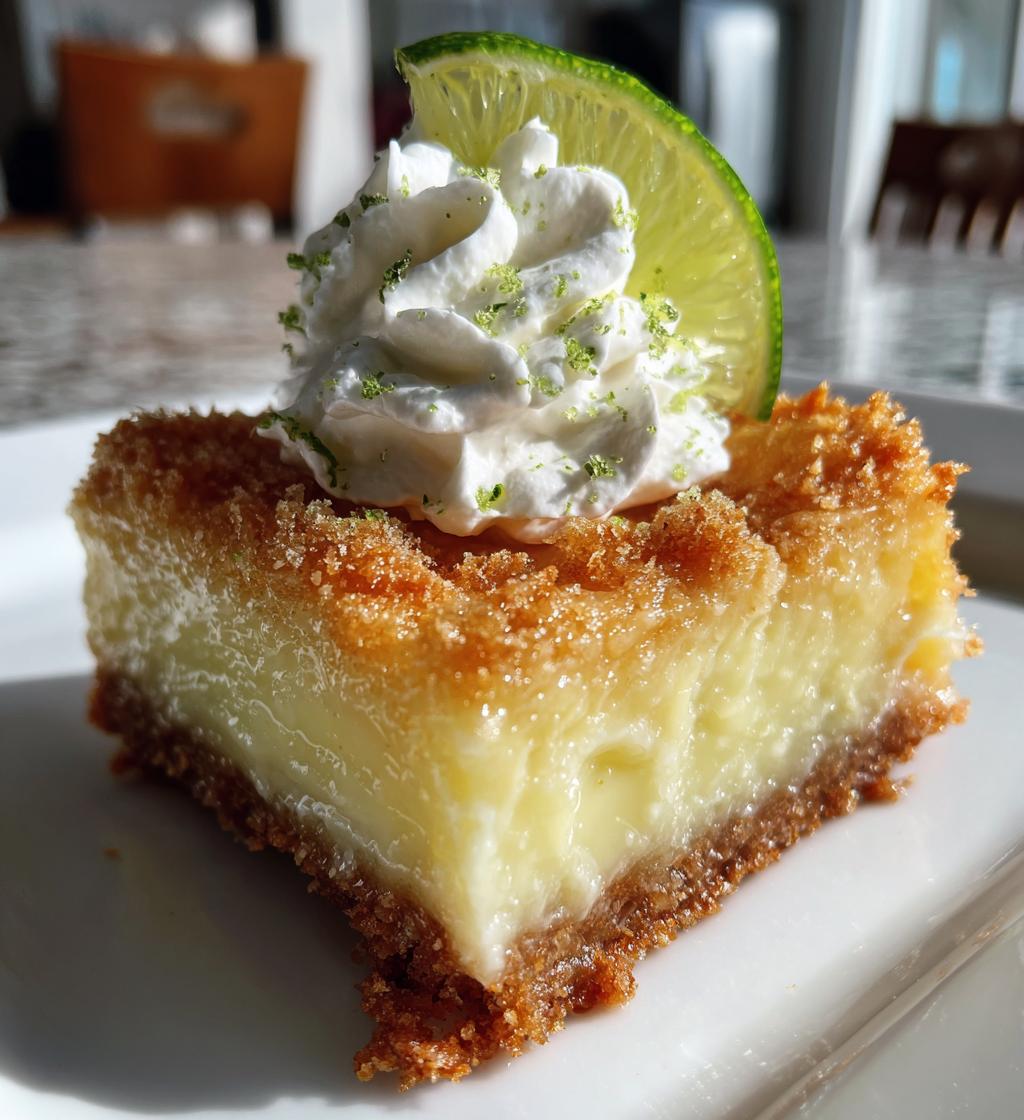
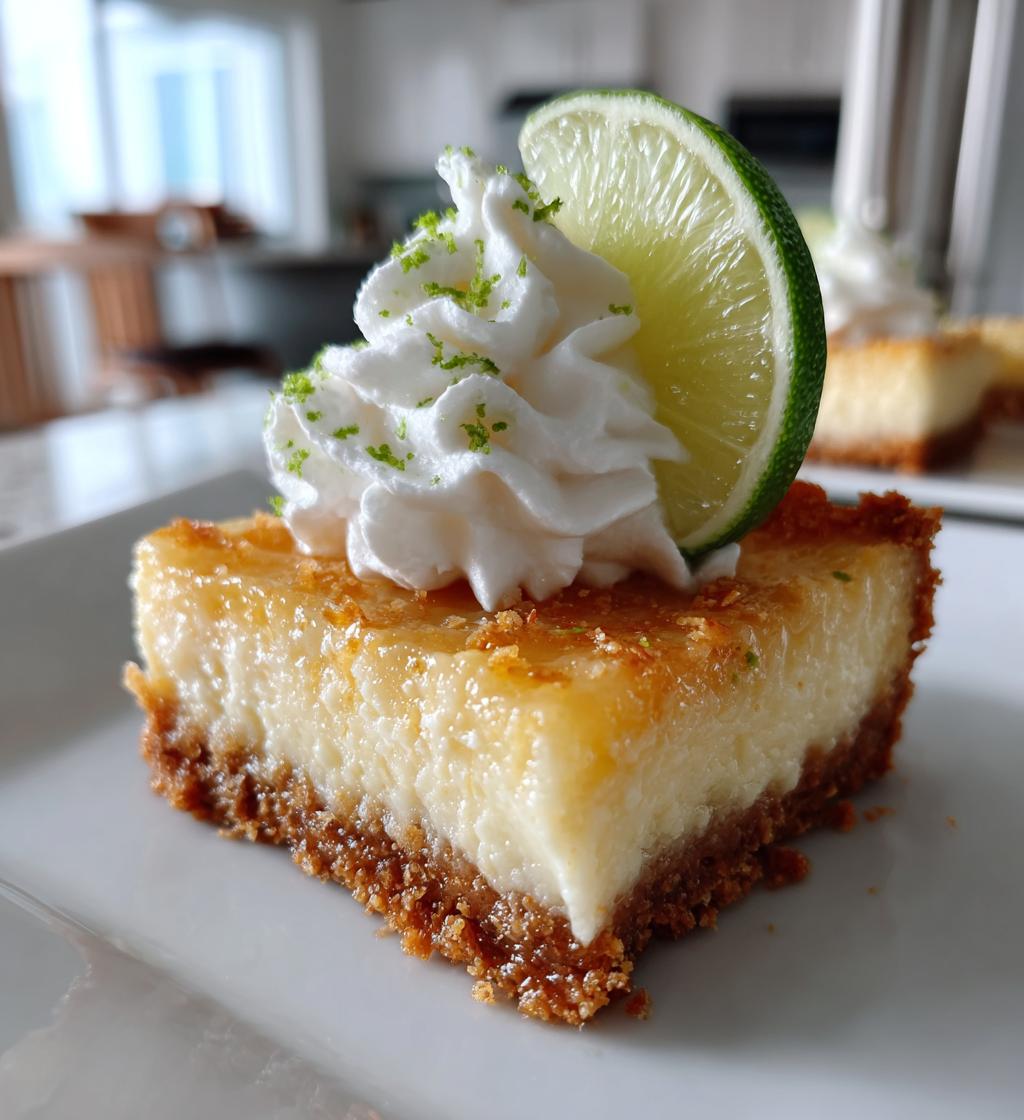
Ah, summer! It’s the season that brings sunshine, laughter, and, of course, my beloved Key Lime Pie Bars. I can’t help but smile when I think back to those warm afternoons spent with family, gathering around the picnic table, the air filled with chatter and the sweet scent of citrus wafting through the breeze. My Aunt Linda would always whip up a batch of these delightfully tangy bars, and they were the star of every gathering. The moment you take a bite, the buttery crust crumbles beautifully while the creamy lime filling dances on your taste buds, balancing that perfect tartness with a hint of sweetness. It’s like a little slice of sunshine on a plate! I remember racing my cousins to be the first to snag the last piece, which was always a battle! These bars are not only a treat to eat but also a nostalgic reminder of those carefree days spent with loved ones. Trust me, once you try making these, you’ll never want to go back to regular pie again!
Ingredients List
To make these delightful Key Lime Pie Bars, you’ll need the following ingredients:
- 1 1/2 cups graham cracker crumbs
- 1/2 cup unsalted butter, melted
- 1/4 cup sugar
- 2 cans (14 ounces each) sweetened condensed milk
- 1/2 cup fresh lime juice
- 1 tablespoon lime zest
- 4 large egg yolks
- Whipped cream for topping
How to Prepare Key Lime Pie Bars
Getting ready to whip up these Key Lime Pie Bars is a breeze! I promise you, it’s a step-by-step journey that’s as satisfying as the end result. Let’s dive right in!
Preheat and Prepare the Crust
First things first, you’ll want to preheat your oven to 350°F (175°C). This step is essential for getting that crust perfectly crispy. While the oven is warming up, grab a mixing bowl and combine the graham cracker crumbs, melted butter, and sugar. Mix them until they form a sandy texture that holds together when you squeeze it in your hand. You’re looking for that perfect buttery blend that screams deliciousness!
Now, take the mixture and press it firmly into the bottom of a baking dish – a 9×13 inch dish works beautifully here. You want to make sure it’s nice and even, so every bite has that glorious crust. Bake it for about 10 minutes until it’s lightly golden and smelling heavenly. Once that’s done, let it cool for a bit. Trust me, letting it cool is key; it will help the filling stay in place when you pour it on top!
Make the Lime Filling
Time for the star of the show – the lime filling! In a clean mixing bowl, whisk together the sweetened condensed milk, fresh lime juice, lime zest, and egg yolks. Make sure to whisk until everything is smooth and well-combined. Oh, the smell of fresh lime is just divine! This part is where the magic happens, so don’t rush it. You want all those flavors to blend beautifully, creating that tangy goodness that everyone will love.
Bake and Cool
With your crust cooled and your filling ready, it’s time to bring it all together. Pour that luscious lime filling over the crust, spreading it evenly. Pop it back into the oven and bake for about 15 to 20 minutes. Keep an eye on it; you’ll know it’s done when the filling is set but still has a little jiggle in the center. Let it cool completely before you even think about cutting it into bars. I know it’s tempting, but this step is crucial! If you cut too soon, you’ll end up with a messy situation. Once it’s cooled, I recommend chilling it in the fridge for a couple of hours. This will make it even more refreshing! After that, get ready to top it with whipped cream and enjoy the delightful tanginess of your homemade Key Lime Pie Bars!
Why You’ll Love This Recipe
- Quick Preparation: With just 15 minutes of prep time, you can have these delicious bars ready to bake!
- Refreshing Flavor: The tangy lime paired with a buttery crust creates a mouthwatering balance that’s perfect for any occasion.
- Perfect for Gatherings: These bars are a crowd-pleaser! They’re easy to cut into portions and serve at parties, potlucks, or family get-togethers.
- Make-Ahead Friendly: They can be made in advance and stored in the fridge, making them a hassle-free dessert option.
Tips for Success
To ensure your Key Lime Pie Bars turn out perfectly, here are a few pro tips you won’t want to miss!
- Fresh is Best: Always use fresh limes for the juice and zest. It makes a world of difference in flavor! The bright, zesty notes from fresh limes can’t be replicated with bottled juice.
- Chill Out: After baking, let your bars cool completely, then chill them in the fridge for at least a couple of hours. This not only helps them set but also enhances the refreshing taste, making each bite even more delightful!
- Storage Secrets: If you have leftovers (which is rare, I know!), store them in an airtight container in the fridge for up to a week. Just be sure to keep the whipped cream separate until you’re ready to serve to maintain that fluffy texture.
These little tips will help you create the most delicious Key Lime Pie Bars that everyone will rave about!
Nutritional Information
Keep in mind that the nutritional values for these Key Lime Pie Bars can vary based on the specific ingredients and brands you use. The information provided here is an estimate, so it’s always a good idea to check the labels for the most accurate details. Enjoy your delicious treat!
FAQ Section
Q1. Can I use bottled lime juice instead of fresh?
While bottled lime juice is convenient, I highly recommend using fresh limes for the best flavor in your Key Lime Pie Bars. The freshness really elevates the tangy taste and aroma!
Q2. How do I know when the bars are done baking?
You’ll know your Key Lime Pie Bars are done when the filling is set but still has a slight jiggle in the center. This ensures a creamy texture without being runny.
Q3. Can I make these bars gluten-free?
Absolutely! Just substitute the graham cracker crumbs with a gluten-free alternative, and you’ll have delicious gluten-free Key Lime Pie Bars that everyone can enjoy!
Q4. How long can I store these bars?
Your Key Lime Pie Bars can be stored in the fridge for up to a week. Just be sure to keep them covered to maintain freshness!
Q5. Can I freeze the bars?
Yes, you can freeze them! Just wrap the bars tightly in plastic wrap and store them in an airtight container. They should keep well for about a month, making them perfect for make-ahead desserts!
Serving Suggestions
When it comes to serving your Key Lime Pie Bars, the options are endless, and I love to get creative! These bars are delightful on their own, but pairing them with some fresh fruit salad brings an extra burst of color and flavor to your dessert spread. Think juicy berries, vibrant mangoes, or even a tropical medley of pineapple and kiwi – it’s like a summer party on a plate!
If you want to elevate the experience even further, serve them alongside a cup of freshly brewed coffee or a refreshing iced tea. The coffee’s warmth complements the tangy lime perfectly, while iced tea adds a cool, crisp contrast. Trust me, these combinations will have your guests coming back for seconds!
Print
Key Lime Pie Bars: 5 Reasons They’ll Brighten Your Day
- Total Time: 45 minutes
- Yield: 12 servings 1x
- Diet: Vegetarian
Description
A delicious and tangy dessert with a buttery crust and creamy lime filling.
Ingredients
- 1 1/2 cups graham cracker crumbs
- 1/2 cup unsalted butter, melted
- 1/4 cup sugar
- 2 cans (14 ounces each) sweetened condensed milk
- 1/2 cup fresh lime juice
- 1 tablespoon lime zest
- 4 large egg yolks
- Whipped cream for topping
Instructions
- Preheat the oven to 350°F (175°C).
- In a bowl, mix graham cracker crumbs, melted butter, and sugar.
- Press the mixture into the bottom of a baking dish.
- Bake for 10 minutes and let cool.
- In another bowl, whisk sweetened condensed milk, lime juice, lime zest, and egg yolks.
- Pour the filling over the crust.
- Bake for 15-20 minutes until set.
- Let cool completely before cutting into bars.
- Top with whipped cream before serving.
Notes
- Use fresh limes for the best flavor.
- Chill the bars for a few hours before serving.
- Store leftovers in the refrigerator.
- Prep Time: 15 minutes
- Cook Time: 30 minutes
- Category: Dessert
- Method: Baking
- Cuisine: American
Nutrition
- Serving Size: 1 bar
- Calories: 250
- Sugar: 20g
- Sodium: 100mg
- Fat: 12g
- Saturated Fat: 7g
- Unsaturated Fat: 3g
- Trans Fat: 0g
- Carbohydrates: 30g
- Fiber: 1g
- Protein: 3g
- Cholesterol: 100mg
Keywords: Key Lime Pie Bars, dessert, lime dessert, bars