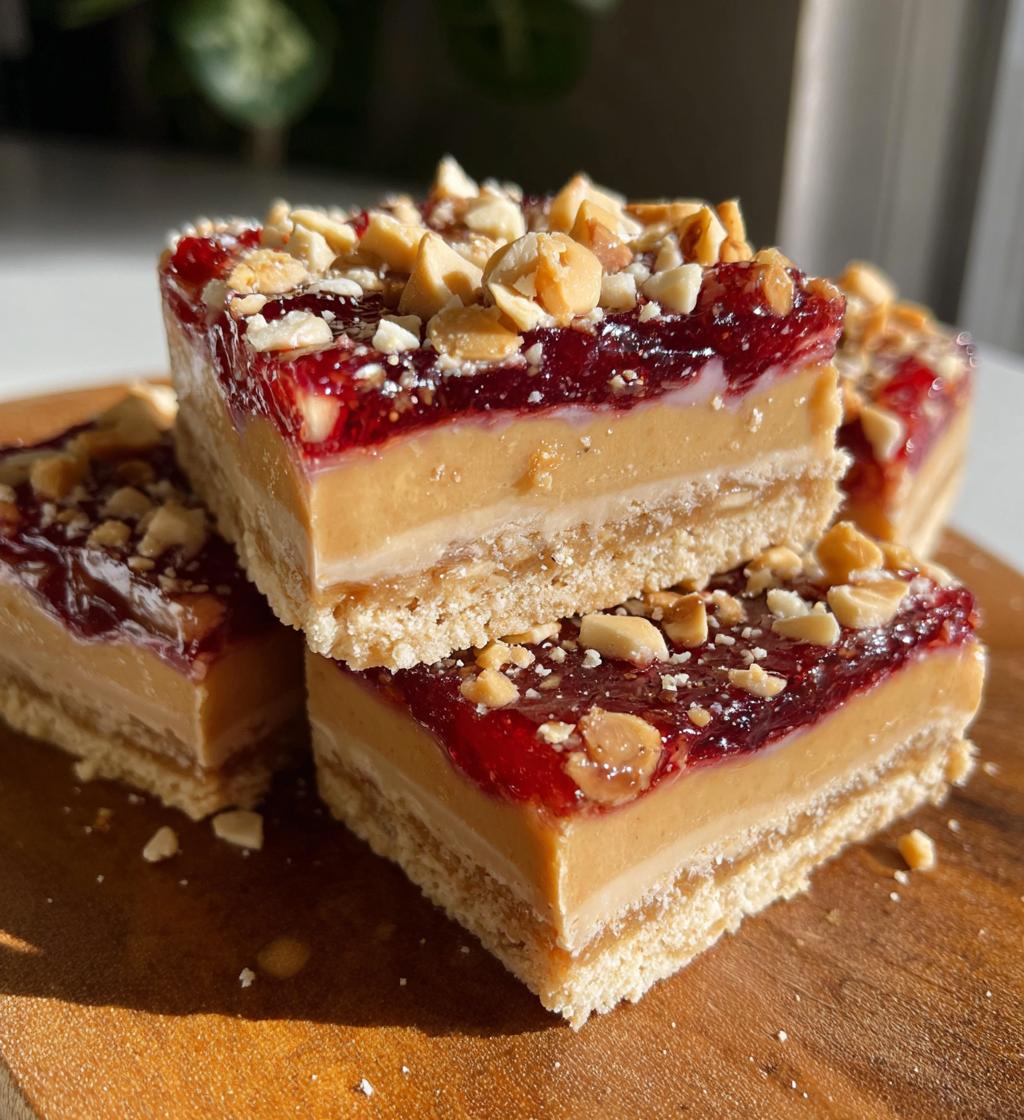
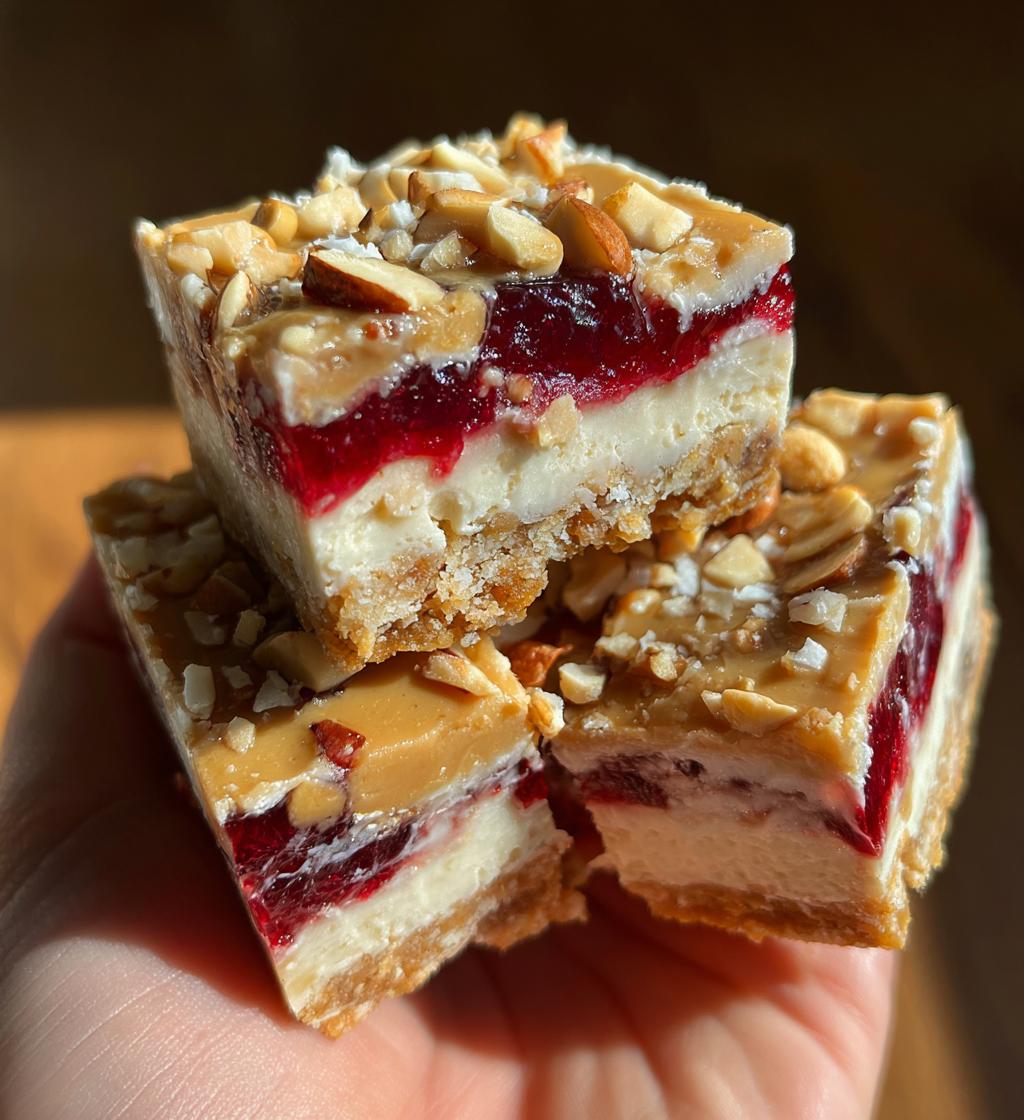
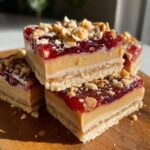
Let me tell you, there’s something incredibly nostalgic about No-Bake Peanut Butter and Jelly Bars! They effortlessly combine the comforting flavors of peanut butter and jelly into a deliciously chewy treat that’s just perfect for any time of day. The best part? You whip them up in a snap—no baking required! Seriously, you can make these in about 15 minutes, and then just pop them in the fridge while you sip a cup of coffee or tea. I remember making these with my mom as a kid, excitedly mixing the peanut butter and honey, and trying to sneak tastes of that sweet jelly. It’s such a simple recipe that brings back those warm, fuzzy memories. Whenever I take a bite of these bars now, I’m transported right back to my childhood, with the sweet, nutty flavors dancing on my tongue. Trust me, you’ll want to give these a try!
Ingredients List
- 1 cup creamy peanut butter
- 1/2 cup honey
- 2 cups rolled oats
- 1/2 cup jelly or jam of your choice
- 1/4 cup chopped nuts (optional)
How to Prepare No-Bake Peanut Butter and Jelly Bars
Making No-Bake Peanut Butter and Jelly Bars is as easy as pie—well, easier actually, since there’s no baking involved! Let’s dive into the simple steps that will have you enjoying these tasty treats in no time.
Step 1: Mix the Peanut Butter and Honey
First things first, grab a mixing bowl and add your creamy peanut butter and honey. Now, it’s time to mix! I like to use a sturdy spatula or even a wooden spoon for this. Stir them together until the mixture is smooth and well-combined. It should have a nice, velvety texture that’s easy to spread. If you find it a bit thick, don’t worry; that’s just how it should be!
Step 2: Combine with Oats
Next up, it’s time to add the rolled oats. Sprinkle them into the peanut butter-honey mixture and stir well until every oat is coated. You want that sticky, sweet goodness to cling to the oats, creating a chewy base for your bars. Trust me; this is where the magic starts to happen!
Step 3: Form the Base Layer
Now, take half of that delicious mixture and press it firmly into the bottom of a lined baking dish. Make sure it’s even! I usually use a spatula or the back of a measuring cup to get it nice and flat. This step is super important because a well-formed base sets the stage for the jelly layer and makes for easy slicing later on.
Step 4: Add the Jelly Layer
Spread your jelly or jam evenly over that lovely peanut butter layer. You can use a spoon or a spatula to help ensure it’s nice and smooth. This is where you can get creative—pick your favorite flavor! The sweet, fruity layer adds a delightful contrast to the rich peanut butter.
Step 5: Top with Remaining Mixture
Now, grab the rest of your peanut butter-oat mixture and carefully spread it on top of the jelly layer. Press it down firmly, making sure everything is compact and secure. This top layer helps seal in all that delicious jelly goodness and creates a perfect bite!
Step 6: Refrigerate and Set
Lastly, it’s time for the hardest part—waiting! Cover the dish and pop it into the refrigerator for at least 2 hours. This setting time is crucial; it allows the bars to firm up and makes cutting them into perfect squares a breeze. Once they’re set, you can slice them up and enjoy your homemade No-Bake Peanut Butter and Jelly Bars!
Why You’ll Love This Recipe
- Quick to make: You can whip these up in just 15 minutes, making them a perfect last-minute treat!
- No baking required: Enjoy the simplicity of a no-bake dessert—just mix, layer, and chill!
- Healthy ingredients: Packed with oats and natural sweeteners, these bars are a wholesome option for a snack.
- Great for kids: The fun flavors and chewy texture make these bars a hit with little ones, and they can even help make them!
- Customizable: Switch up the jelly flavors or add in some nuts for a unique twist every time you make them.
Tips for Success
To ensure your No-Bake Peanut Butter and Jelly Bars turn out perfectly every time, here are some of my favorite tips that I’ve learned through trial and error:
- Use room temperature ingredients: Make sure your peanut butter and honey are at room temperature. This makes them easier to mix and helps create that smooth, creamy texture you want.
- Press the mixture firmly: When forming the base and topping layers, really press the mixture down firmly. This helps everything stick together and prevents your bars from crumbling when you cut into them later!
- Experiment with jelly flavors: Don’t be afraid to get creative with your jelly or jam choices! Try different flavors like raspberry, strawberry, or even a spicy jalapeño jelly for a fun twist. Each flavor brings its own unique touch!
- Let them chill: Be patient—allowing the bars to chill for the full 2 hours is key. This wait time helps them set up nicely and ensures that you get clean, beautiful cuts.
- Cut with a warm knife: For perfectly clean edges, run your knife under hot water, dry it off, and then slice through the bars. This little trick makes a world of difference!
With these tips, you’ll be well on your way to creating delicious No-Bake Peanut Butter and Jelly Bars that everyone will love!
Variations
One of the best things about No-Bake Peanut Butter and Jelly Bars is how versatile they are! You can easily switch things up to suit your mood or what you have on hand. Here are some fun ideas to customize your bars:
- Different Nut Butters: Swap out the creamy peanut butter for almond butter, cashew butter, or even sunflower seed butter for a nut-free option. Each nut butter brings its own unique flavor and texture!
- Add Chocolate Chips: Who doesn’t love a little chocolate? Mix in some mini chocolate chips or chunks into the peanut butter mixture for a delightful treat that feels indulgent.
- Incorporate Seeds: For added crunch and nutrition, toss in some chia seeds, flaxseeds, or even sunflower seeds. They not only enhance the texture but also boost the health benefits of your bars.
- Fruit Additions: Consider folding in some dried fruit like cranberries, raisins, or chopped dates into the mixture. They add a chewy sweetness that perfectly complements the peanut butter and jelly flavors.
- Spice it Up: A sprinkle of cinnamon or a dash of vanilla extract can elevate the flavor profile. Experimenting with spices can add a lovely warmth to your bars!
These variations let you get creative and make each batch of No-Bake Peanut Butter and Jelly Bars uniquely yours. So go ahead and have fun experimenting—your taste buds will thank you!
Storage & Reheating Instructions
Storing your No-Bake Peanut Butter and Jelly Bars is super simple, and I want to make sure you enjoy them at their best! Once you’ve cut them into bars, place them in an airtight container to keep them fresh. They’ll stay delicious in the refrigerator for up to one week. Just make sure to separate the layers with parchment paper if you’re stacking them, so they don’t stick together—trust me, no one wants a peanut butter and jelly mess!
If you find yourself with leftovers (or if you want to make a double batch for later!), you can absolutely freeze these bars! Just wrap each bar tightly in plastic wrap or place them in a freezer-safe container. They’ll keep well in the freezer for up to three months. When you’re ready for a treat, simply take them out and let them thaw in the fridge or at room temperature for about 30 minutes. It’s like having a little taste of nostalgia ready to go whenever you need it!
Nutritional Information Section
Now, let’s talk numbers! Here’s the estimated nutritional data for each No-Bake Peanut Butter and Jelly Bar, so you know exactly what you’re enjoying:
- Calories: 180
- Fat: 8g
- Saturated Fat: 1.5g
- Unsaturated Fat: 6.5g
- Cholesterol: 0mg
- Sodium: 50mg
- Carbohydrates: 23g
- Fiber: 3g
- Sugar: 10g
- Protein: 5g
Keep in mind, these values are estimates and can vary based on the specific ingredients you choose, like the type of jelly or nuts you use. But overall, these bars offer a delightful balance of protein, healthy fats, and just the right amount of sweetness, making them a great snack option!
FAQ Section
Can I use crunchy peanut butter?
Absolutely! If you love that delightful crunch, feel free to swap out creamy peanut butter for crunchy. It’ll add a lovely texture to your No-Bake Peanut Butter and Jelly Bars, making each bite even more satisfying!
How long do these bars last?
Your No-Bake Peanut Butter and Jelly Bars will stay fresh in the refrigerator for up to one week. Just remember to store them in an airtight container to keep them from drying out. If you have leftovers, you can always freeze them for up to three months for a tasty treat later!
Can I make these bars vegan?
Yes, you can! To make your No-Bake Peanut Butter and Jelly Bars vegan, simply use maple syrup or agave nectar instead of honey. This way, you can enjoy the same delicious flavors while keeping it plant-based!
What kind of jelly or jam should I use?
You can use any flavor of jelly or jam that you love! Strawberry and grape are classic choices, but don’t hesitate to get adventurous with raspberry, blueberry, or even something unique like peach or apricot. Each flavor will give your bars a different twist!
Can I add protein powder to the mixture?
Yes, you can definitely add protein powder for an extra boost! Just mix in a scoop or two to the peanut butter and honey mixture. It’s a great way to make these bars a more filling snack, especially if you’re looking for some added nutrition!
No-Bake Peanut Butter and Jelly Bars: 5 Minute Delight
- Total Time: 2 hours 15 minutes
- Yield: 12 bars 1x
- Diet: Vegetarian
Description
No-Bake Peanut Butter and Jelly Bars are a quick and easy treat that combines the classic flavors of peanut butter and jelly in a convenient bar form.
Ingredients
- 1 cup peanut butter
- 1/2 cup honey
- 2 cups rolled oats
- 1/2 cup jelly or jam of your choice
- 1/4 cup chopped nuts (optional)
Instructions
- In a bowl, mix peanut butter and honey until smooth.
- Add rolled oats and stir until well combined.
- Press half of the mixture into the bottom of a lined baking dish.
- Spread the jelly evenly over the peanut butter layer.
- Top with the remaining peanut butter mixture and press down.
- Refrigerate for at least 2 hours before cutting into bars.
Notes
- Store in the refrigerator for up to one week.
- Use any flavor of jelly or jam you prefer.
- Chop nuts for added crunch if desired.
- Prep Time: 15 minutes
- Cook Time: 0 minutes
- Category: Dessert
- Method: No-Bake
- Cuisine: American
Nutrition
- Serving Size: 1 bar
- Calories: 180
- Sugar: 10g
- Sodium: 50mg
- Fat: 8g
- Saturated Fat: 1.5g
- Unsaturated Fat: 6.5g
- Trans Fat: 0g
- Carbohydrates: 23g
- Fiber: 3g
- Protein: 5g
- Cholesterol: 0mg
Keywords: No-Bake Peanut Butter and Jelly Bars