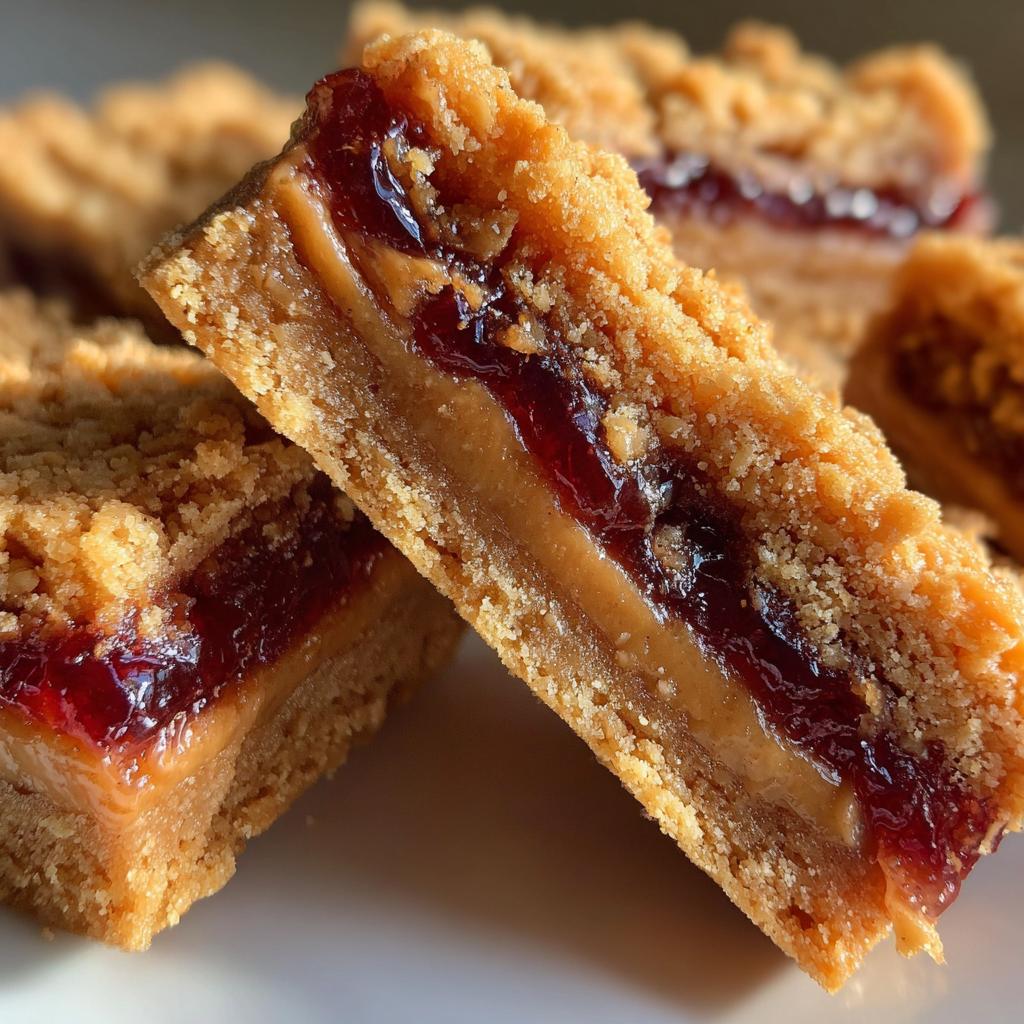
Oh, the delightful combination of peanut butter and jelly! It’s a classic that never goes out of style, and turning it into dessert form with these Peanut Butter and Jelly Bars is nothing short of genius! I mean, who doesn’t love a sweet, chewy bar that captures that nostalgic taste we all grew up with? This recipe is super simple, making it perfect for both kids and adults alike. In fact, I can already picture the smiles on my kids’ faces when they take that first bite. What’s even better is that it only takes about 10 minutes to prep and a quick bake in the oven! Trust me, you’ll want to whip up a batch for snack time, lunchboxes, or even a sweet treat after dinner. These bars are a crowd-pleaser and a great way to bring joy to any occasion. So, grab your ingredients, and let’s dive into this deliciously easy recipe that’s sure to become a family favorite!
Ingredients List
- 1 cup peanut butter (smooth or crunchy, your choice – both work beautifully!)
- 1 cup sugar (granulated for a sweet touch that balances perfectly)
- 1 cup rolled oats (old-fashioned oats give the best texture, trust me!)
- 1/2 cup jelly or jam (any flavor you love – grape, strawberry, or raspberry are all fantastic options)
- 1/2 teaspoon salt (just a pinch to enhance all the flavors)
- 1 teaspoon vanilla extract (pure vanilla extract is best for that warm flavor)
How to Prepare Peanut Butter and Jelly Bars
Now that you’ve gathered your ingredients, let’s dive into the fun part – making these scrumptious Peanut Butter and Jelly Bars! I promise, it’s as easy as pie… or should I say, as easy as bars? Let’s break it down step by step so you can have these treats ready in no time!
Preheat the Oven
The first thing you want to do is preheat your oven to 350°F (175°C). Preheating is crucial because it ensures that your bars bake evenly and come out perfectly golden brown. While the oven is warming up, you can start mixing your ingredients. Just make sure to give your oven enough time to reach the right temperature. A little tip? If you want an even bake, use an oven thermometer to double-check that your oven is accurate. Nothing worse than undercooked or overcooked bars, right?
Mix Ingredients
In a large mixing bowl, combine your peanut butter, sugar, rolled oats, salt, and vanilla extract. I like to use a sturdy wooden spoon or a spatula for this – it just feels more satisfying! Mix everything together until it’s well combined and you have a nice, thick mixture. It might take a minute or two, but don’t rush it! You want that creamy peanut butter to embrace every bit of sugar and oats. When it’s all mixed, it should hold together nicely without being too crumbly.
Layer the Mixture
Now comes the fun part – layering! Take about half of your peanut butter mixture and press it firmly into a greased baking pan. Make sure to spread it evenly across the bottom; this will act as your base. Next, grab your jelly or jam and spread it over the pressed mixture. Don’t be shy with it – a generous layer really brings the flavor! Finally, take the rest of your peanut butter mixture and crumble it over the jelly, pressing it down gently but evenly. It’s important to cover the jelly well so it doesn’t ooze out while baking. The layering is what makes these bars so delightful!
Baking the Bars
Once your pan is layered up and looking delicious, pop it into the oven! Bake for about 25-30 minutes. The bars are done when they turn a lovely golden brown, and the edges start pulling away slightly from the pan. Keep an eye on them, though – you don’t want to overbake and risk dryness. A little tip: if the top looks too brown before they’re done, you can cover the pan lightly with foil to prevent over-browning while the inside continues to cook.
Cooling and Cutting
Once you’ve baked your bars to perfection, take them out of the oven and let them cool in the pan for about 10-15 minutes. This cooling time is crucial! If you try to cut them too soon, you’ll end up with a gooey mess. Once they’ve cooled a bit, transfer them to a wire rack to cool completely before slicing. For clean cuts, I recommend using a sharp knife and wiping it clean between cuts. That way, you get those beautiful, even bars that look as good as they taste!
Tips for Success
Making the perfect Peanut Butter and Jelly Bars can be a breeze with a few handy tips! First off, if you’re not a fan of peanut butter, feel free to swap it out for almond butter or sunflower seed butter. Just remember, each nut butter has its own personality, so the flavor may shift a bit, but it’ll still be delicious!
Next, let’s talk about jelly. While I love a classic grape or strawberry, you can get creative! Try using a fruit spread or even a flavored nut butter for a twist on the traditional taste. Also, if you want a bit of crunch, toss in some chopped nuts or chocolate chips into the mixture – yum!
To ensure your bars hold together well, make sure to pack that base layer down firmly. You want it tight enough so it doesn’t crumble apart when you cut into it. Lastly, if you find your bars are too crumbly after baking, a drizzle of honey or a bit of melted chocolate on top can help bind everything together. Trust me, these little tweaks will make your bars even more scrumptious!
Nutritional Information
Here’s a quick look at the estimated nutritional information for each serving of these delicious Peanut Butter and Jelly Bars. Keep in mind that these values can vary based on specific brands and ingredients you use, but this should give you a pretty good idea of what to expect!
- Serving Size: 1 bar
- Calories: 180
- Total Fat: 8g
- Saturated Fat: 1g
- Trans Fat: 0g
- Unsaturated Fat: 7g
- Cholesterol: 0mg
- Sodium: 100mg
- Total Carbohydrates: 24g
- Dietary Fiber: 2g
- Sugars: 12g
- Protein: 4g
This simple breakdown can help you keep track of what you’re munching on while enjoying these tasty treats. They’re not just satisfying your sweet tooth, but also offering a decent amount of nutrition, especially with the oats and peanut butter providing some fiber and protein. So go ahead, indulge a little – you deserve it!
Why You’ll Love This Recipe
- Quick Preparation: You can whip these Peanut Butter and Jelly Bars up in just 10 minutes of prep time!
- Easy to Make: With just a few simple steps, even beginner bakers will find success with this recipe.
- Delicious Flavor: The combination of creamy peanut butter and sweet jelly creates a nostalgic taste that’s hard to resist.
- Kid-Friendly: These bars are perfect for kids’ lunches or after-school snacks, making them a hit with the whole family.
- Versatile: You can easily customize the flavor by using different jams or nut butters to suit your taste!
Trust me, once you try these bars, you’ll be making them again and again! They’re not just a treat, but a fun activity to share with your loved ones!
FAQ Section
Got questions? Don’t worry, I’ve got you covered! Here are some common queries about making these delightful Peanut Butter and Jelly Bars.
Can I use a different nut butter?
Absolutely! If peanut butter isn’t your thing, feel free to swap it for almond butter, cashew butter, or even sunflower seed butter for a nut-free option. Just keep in mind that the flavor will change slightly, but they’ll still be delicious!
How should I store the bars?
Once your Peanut Butter and Jelly Bars are completely cooled, store them in an airtight container at room temperature for up to a week. If you want to keep them fresh longer, you can refrigerate them or freeze them for up to 3 months. Just make sure to wrap them well to prevent freezer burn.
Can I make these bars gluten-free?
Yes! To make these bars gluten-free, simply use certified gluten-free rolled oats. Check the jelly or jam label as well to ensure it’s gluten-free, and you’re all set!
What can I do if my bars crumble when cut?
If your bars are crumbling, it might be due to not packing the base layer tightly enough. Next time, press it down firmly before adding the jelly. If they still seem too crumbly, a drizzle of honey or melted chocolate on top can help bind everything together.
Storage & Reheating Instructions
To keep your Peanut Butter and Jelly Bars fresh and delicious, store them in an airtight container at room temperature for up to a week. If you want to extend their shelf life, pop them in the fridge, where they’ll last for about two weeks. For longer storage, these bars freeze beautifully! Just wrap them tightly in plastic wrap or aluminum foil, then place them in a freezer-safe container. They can be frozen for up to three months, so you’ll always have a sweet treat on hand!
If you decide to reheat them, simply pop a bar in the microwave for about 10-15 seconds. This will bring back that warm, gooey goodness that makes them so irresistible. Just be careful not to overheat, or they might get a bit too melty!
Print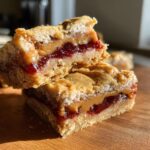
Peanut Butter and Jelly Bars: 5 Reasons You’ll Adore Them
- Total Time: 40 minutes
- Yield: 12 bars 1x
- Diet: Vegetarian
Description
A delicious and easy-to-make dessert combining peanut butter and jelly in bar form.
Ingredients
- 1 cup peanut butter
- 1 cup sugar
- 1 cup rolled oats
- 1/2 cup jelly or jam
- 1/2 teaspoon salt
- 1 teaspoon vanilla extract
Instructions
- Preheat your oven to 350°F (175°C).
- In a bowl, mix peanut butter, sugar, oats, salt, and vanilla.
- Press half of the mixture into a greased baking pan.
- Spread jelly over the pressed mixture.
- Top with the remaining mixture.
- Bake for 25-30 minutes until golden brown.
- Let it cool before cutting into bars.
Notes
- Store in an airtight container.
- These bars can be frozen for up to 3 months.
- Use any flavor of jelly you prefer.
- Prep Time: 10 minutes
- Cook Time: 30 minutes
- Category: Dessert
- Method: Baking
- Cuisine: American
Nutrition
- Serving Size: 1 bar
- Calories: 180
- Sugar: 12g
- Sodium: 100mg
- Fat: 8g
- Saturated Fat: 1g
- Unsaturated Fat: 7g
- Trans Fat: 0g
- Carbohydrates: 24g
- Fiber: 2g
- Protein: 4g
- Cholesterol: 0mg
Keywords: Peanut Butter and Jelly Bars