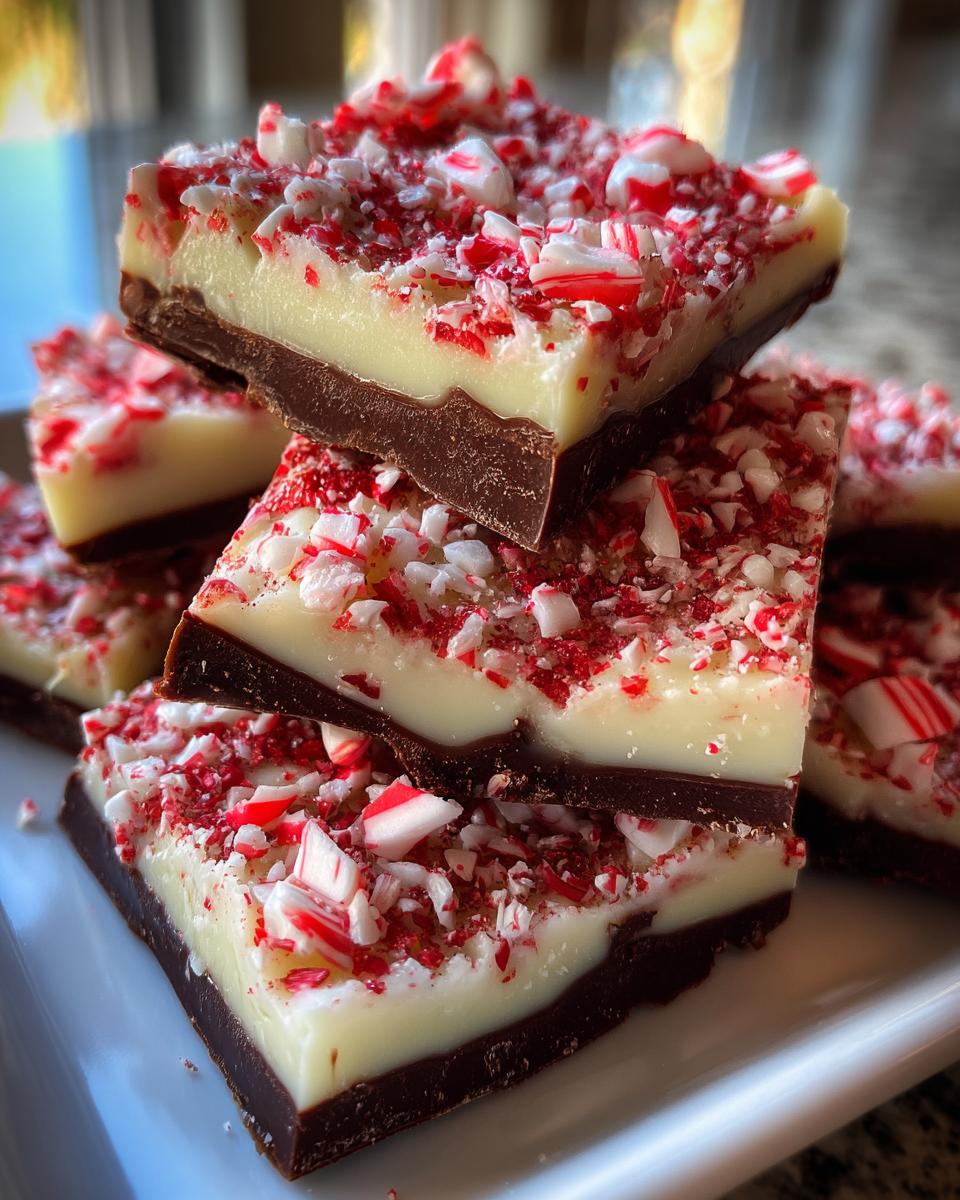
Ah, peppermint bark! It’s like a little piece of holiday magic that dances on your taste buds! Growing up, my family made it a tradition to whip up batches of this delightful treat each December. I can still remember the sweet aroma of melting chocolate mingling with the fresh, crisp scent of peppermint wafting through the house. There’s just something about those beautiful layers of dark and white chocolate, perfectly complemented by the crunch of crushed peppermint candies that makes peppermint bark a favorite in my home. It’s not just a dessert; it’s a celebration of the season!
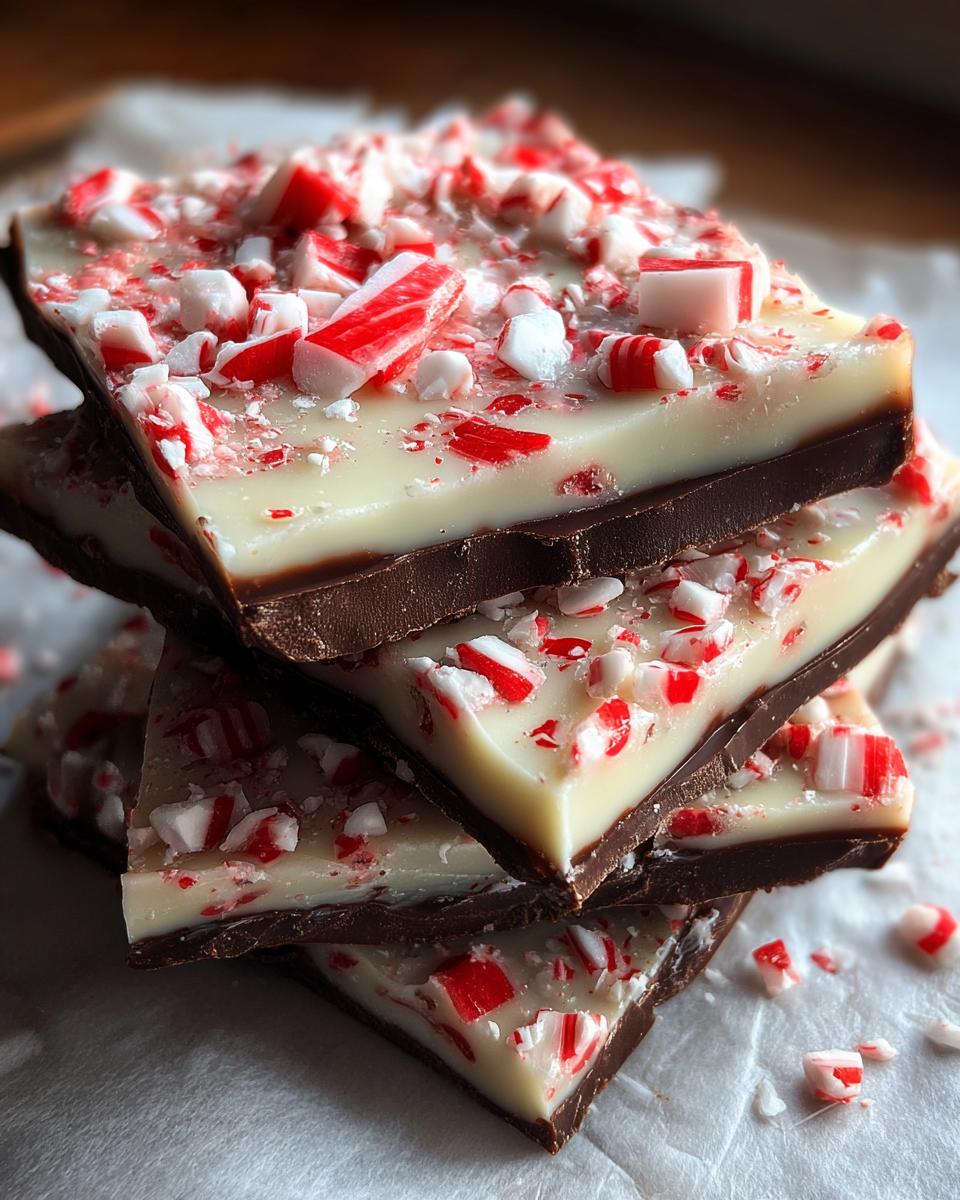
Every bite is a delightful contrast, with the rich, smooth dark chocolate giving way to the sweet and creamy white chocolate, topped with a sprinkle of peppermint for that refreshing zing. I’ve often found that this treat brings people together—friends and family gathered around the kitchen, each piece disappearing faster than the last! Trust me, once you’ve made peppermint bark, it’ll become a staple in your holiday festivities, too. So, let’s dive into this simple yet scrumptious recipe and spread some cheer this festive season!
Ingredients List
To whip up the most delightful peppermint bark, you’ll need just a few simple ingredients. Here’s what you’ll gather:
- 8 oz dark chocolate, chopped
- 8 oz white chocolate, chopped
- 1/2 tsp peppermint extract
- 1/2 cup crushed peppermint candies
Make sure to use high-quality chocolate for the best flavor—it really makes a difference! The dark chocolate provides a rich base, while the white chocolate adds that creamy sweetness we love. And don’t skimp on the peppermint candies; they’re the finishing touch that brings everything together beautifully!
How to Prepare Peppermint Bark
Making peppermint bark is a breeze, and I promise you’ll love the process as much as the result! Follow these simple steps, and you’ll have a festive treat that’s as beautiful as it is delicious. Ready? Let’s get started!
Step-by-Step Instructions
Melting the Dark Chocolate
First things first, we need to melt that dark chocolate! I like to use a double boiler for this, which is just a heatproof bowl set over a pot of simmering water. Make sure the bowl doesn’t touch the water—this keeps the chocolate from getting too hot. Stir the chopped dark chocolate gently as it melts, and keep an eye on it. It should take about 5-7 minutes to melt completely into a smooth, glossy pool of chocolate. Oops! Don’t let it sit too long or it might seize up!
Spreading the Layers
Once your dark chocolate is melted, it’s time to spread it out! Pour the warm chocolate onto a parchment-lined baking sheet, and use a spatula to spread it evenly into a rectangle about 1/4 inch thick. Make sure to get those edges nice and tidy—presentation matters! Now, pop this into the fridge for about 15-20 minutes, or until it’s firm to the touch. This is the hardest part—waiting! But trust me, it’s worth it.
Adding the White Chocolate Layer
While that dark chocolate is chilling, let’s melt the white chocolate! Use the same double boiler method, stirring gently until it’s completely smooth. Once it’s melted, take it off the heat and mix in the peppermint extract. This adds that refreshing burst of flavor we all adore. Now, carefully pour the white chocolate over the chilled dark chocolate layer, spreading it out evenly. Don’t worry if it mixes a little—that’s part of the charm!
Final Touches
Now for the fun part—sprinkling the crushed peppermint candies on top! Make sure to distribute them evenly across the white chocolate layer; you want every bite to have that delightful crunch. Once you’ve added the toppings, return the baking sheet to the fridge and let it chill for another 30 minutes, or until everything is set. When it’s ready, break it into pieces, and voilà! You’ve made peppermint bark that’s sure to impress!
Why You’ll Love This Recipe
This peppermint bark recipe is not only scrumptious but also incredibly convenient, making it a perfect addition to your holiday festivities. Here are a few reasons why you’ll love it:
- Quick Preparation: With just 30 minutes from start to finish, you can whip up this treat in no time!
- No Baking Required: That’s right! This is a no-bake dessert, so you can skip the oven and avoid any baking mishaps.
- Delicious Flavor Combination: The rich dark chocolate paired with sweet white chocolate and refreshing peppermint creates a flavor explosion that’s simply irresistible.
- Festive Appeal: Not only does it taste great, but its beautiful layers and vibrant colors make it a stunning addition to any holiday spread.
- Perfect for Sharing: This treat is great for gifting or bringing to holiday parties. Everyone will want a piece of your homemade goodness!
Trust me, once you make this peppermint bark, it’ll quickly become a holiday staple you can’t live without!
Tips for Success
To make sure your peppermint bark turns out perfectly every time, I’ve gathered some of my best tips for success! These little insights can make a world of difference in both flavor and presentation.
- Choose Quality Chocolate: Seriously, don’t skimp here! Using high-quality dark and white chocolate will elevate your peppermint bark to a whole new level. Look for chocolate with a high cocoa content for the best flavor.
- Be Patient with Melting: Whether you’re using a double boiler or the microwave, take your time melting the chocolate. If it’s too hot or melts too quickly, it can seize up and ruin the texture. Stir gently and keep a close eye on it!
- Spread Evenly: When spreading the melted chocolate on the baking sheet, use a spatula to create a smooth, even layer. Aim for about 1/4 inch thick. This helps ensure that every piece has the same deliciousness!
- Chill Thoroughly: Don’t rush the chilling process! Allowing the layers to set properly is crucial for achieving that signature snap when you break the bark. Give it the full chilling time as directed—your patience will pay off!
- Crush Peppermint Candies Just Before Using: To get the best crunch and flavor, crush your peppermint candies right before sprinkling them on top. This keeps them fresh and vibrant, adding that extra zing to your bark.
- Store Properly: Keep your peppermint bark in an airtight container at room temperature to maintain its freshness. If it’s particularly warm, you might want to store it in the fridge, but let it come to room temperature before serving for the best texture!
With these tips in hand, you’re all set to make the most scrumptious peppermint bark that’ll impress everyone this holiday season. Enjoy the process, and happy baking!
Variations
One of the best things about peppermint bark is how versatile it is! You can easily customize this delightful treat to suit your taste or to use up ingredients you have on hand. Here are some fun variations to consider:
- Use Milk Chocolate: If you prefer a sweeter option, substitute the dark chocolate with milk chocolate. It adds a creamy touch that balances beautifully with the peppermint!
- Add Nuts: For some extra crunch, consider folding in chopped nuts like almonds, pecans, or walnuts into either chocolate layer before chilling. This adds a delightful texture and flavor contrast.
- Drizzle with Chocolate: After your peppermint bark has set, melt a bit more chocolate (dark, milk, or even white) and drizzle it over the top for a decorative touch. It’s not only pretty but also adds another layer of chocolatey goodness!
- Try Different Extracts: Experiment with other flavor extracts like orange or vanilla to give your bark a unique twist. Just be sure to use them sparingly so they don’t overpower the peppermint!
- Layer with Different Candies: Swap out the crushed peppermint candies for other toppings like crushed Oreos, toffee bits, or even colorful holiday sprinkles for a fun twist. This not only changes the flavor but makes your peppermint bark look festive!
Feel free to get creative! The basic recipe is just a starting point, and there are endless possibilities to make peppermint bark your own. Whatever you choose, I guarantee it’ll be a hit during the holiday season!
Storage & Reheating Instructions
Storing your peppermint bark properly is key to keeping it fresh and delicious, so let’s make sure we get this right! Once your peppermint bark is completely set and broken into pieces, you’ll want to keep it in an airtight container. This helps prevent any moisture from getting in and keeps those lovely flavors intact.
Store the container at room temperature for the best texture. If your kitchen tends to get warm, you might want to keep it in the fridge, but be sure to let it come back to room temperature before serving. This way, you’ll enjoy that perfect snap and melt-in-your-mouth creaminess!
Now, reheating? There’s really no need! Peppermint bark is best enjoyed as it is. If you happen to have some leftover (which is rare, trust me!), just return it to that airtight container and enjoy it over the next couple of weeks. Just keep an eye on it; while it can last for about two weeks, the sooner you indulge, the fresher the flavors will be!
So, keep your peppermint bark safe and sound, and you’ll be ready to share this delightful treat whenever the mood strikes or when holiday guests come knocking!
Nutritional Information
Here’s the estimated nutritional breakdown for each piece of this delicious peppermint bark. Remember, these values are estimates and can vary based on the specific ingredients you use, so take them with a grain of salt (or a sprinkle of crushed peppermint!).
- Calories: 150
- Fat: 9g
- Saturated Fat: 5g
- Unsaturated Fat: 3g
- Trans Fat: 0g
- Cholesterol: 5mg
- Sodium: 15mg
- Carbohydrates: 17g
- Fiber: 1g
- Sugar: 12g
- Protein: 2g
With its delightful balance of rich chocolate and refreshing peppermint, this treat is a festive way to indulge without going overboard. Enjoy every delicious bite while keeping these numbers in mind!
FAQ Section
Got questions about peppermint bark? Don’t worry, I’ve got you covered! Here are some common queries that pop up when making this festive treat:
How long can I store peppermint bark?
Peppermint bark can be stored in an airtight container at room temperature for about two weeks. If you want to keep it fresh even longer, you can store it in the fridge, but remember to let it come to room temperature before enjoying it for the best texture!
Can I use different types of chocolate for this recipe?
Absolutely! While I love the classic combination of dark and white chocolate, you can switch things up by using milk chocolate instead of dark chocolate for a sweeter treat. Just keep in mind that the flavor profile will change a bit!
What can I substitute for peppermint extract?
If peppermint extract isn’t your thing, you can try using other flavor extracts like vanilla or almond for a unique twist. Just be careful with the amount; you want to enhance the flavor without overpowering the peppermint vibe!
Can I add nuts or other toppings to my peppermint bark?
Definitely! Feel free to get creative by adding chopped nuts like almonds or walnuts, or even other toppings like crushed Oreos or colorful holiday sprinkles. This adds a fun texture and flavor that complements the chocolate beautifully!
What if my chocolate seizes while melting?
Oops! If your chocolate seizes, it can be a bit frustrating. This usually happens if water gets into the chocolate or it gets too hot. If this happens, don’t panic! You can try adding a teaspoon of vegetable oil and stirring until it smooths out, but prevention is key—just keep a close eye on that melting process!
These FAQs should help you navigate any bumps along the way while making your peppermint bark! Enjoy creating this holiday favorite, and don’t hesitate to reach out if you have more questions!
Print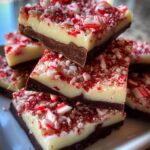
Peppermint Bark: 5 Reasons You’ll Love This Holiday Delight
- Total Time: 30 minutes
- Yield: 12 servings 1x
- Diet: Vegetarian
Description
A delicious holiday treat made with layers of chocolate and peppermint.
Ingredients
- 8 oz dark chocolate
- 8 oz white chocolate
- 1/2 tsp peppermint extract
- 1/2 cup crushed peppermint candies
Instructions
- Melt dark chocolate in a double boiler.
- Spread melted dark chocolate on a parchment-lined baking sheet.
- Chill until firm.
- Melt white chocolate and stir in peppermint extract.
- Spread white chocolate over dark chocolate layer.
- Sprinkle crushed peppermint candies on top.
- Chill until set.
- Break into pieces and serve.
Notes
- Store in an airtight container.
- Use high-quality chocolate for best flavor.
- Prep Time: 15 minutes
- Cook Time: 15 minutes
- Category: Dessert
- Method: No-Bake
- Cuisine: American
Nutrition
- Serving Size: 1 piece
- Calories: 150
- Sugar: 12g
- Sodium: 15mg
- Fat: 9g
- Saturated Fat: 5g
- Unsaturated Fat: 3g
- Trans Fat: 0g
- Carbohydrates: 17g
- Fiber: 1g
- Protein: 2g
- Cholesterol: 5mg
Keywords: Peppermint Bark, Holiday Treat, Chocolate Dessert